You can set your custom/private nameserver from WHM.
1. Login to your WHM Account.
2. Go to Server Configuration >> Basic WebHost Manager® Setup or type Basic in the search box, and it will display the Basic WebHost Manager® Setup option. Click on it.

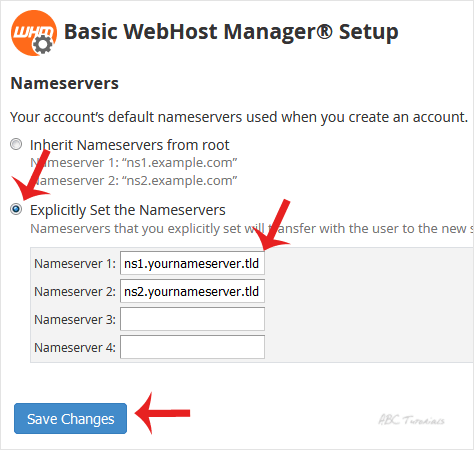
3. Under Nameservers, Select Explicitly Set the Nameserver and enter or change the nameserver in Nameserver 1, 2 fields. Then, click on Save Changes.
Note: Domain propagation takes up to 24 hours.
Leave a Reply