
Finally ditching that old file server or NAS? Wahoo! Moving to Office 365 Teams is actually quite straightforward even if you have terabytes of data to transfer. The more data you have to migrate the more time it will take to manage and sync but this method has worked for me every time so far from small NAS migrations to large file servers with multiple file shares.
The breakdown of steps is as follows:
- Organise your existing share and folder structures.
- Mirror your folder structure in Office 365 Teams and set user permissions.
- Setup mapped drives to the source files.
- Connect OneDrive to each Team.
- Run the file sync.
- Resolve sync errors.
- Decommission the file server / NAS.
1. Organise your existing share and folder structures.
In Teams user access permissions are set at the team level so you need to ensure that your existing folders and file shares are organised appropriately. In Teams you cant give someone access to a team then deny or allow access to specific folders, its all or nothing. In the planning stages of your migration you may find you have to reorganise your existing folder structure.
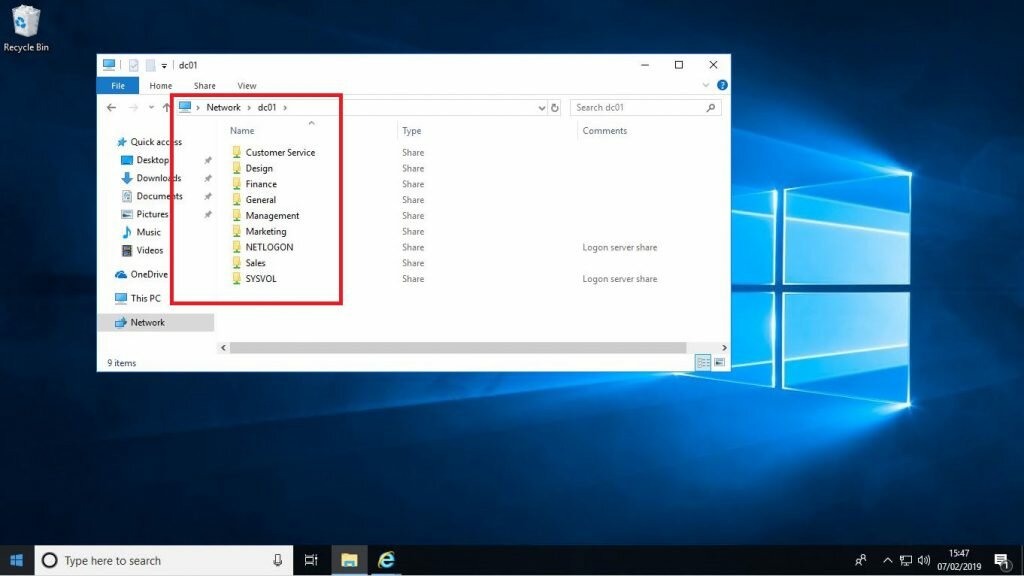
In the example below the file server has several shares organised by department. This is a great way to arrange your folders so do something similar if you can.
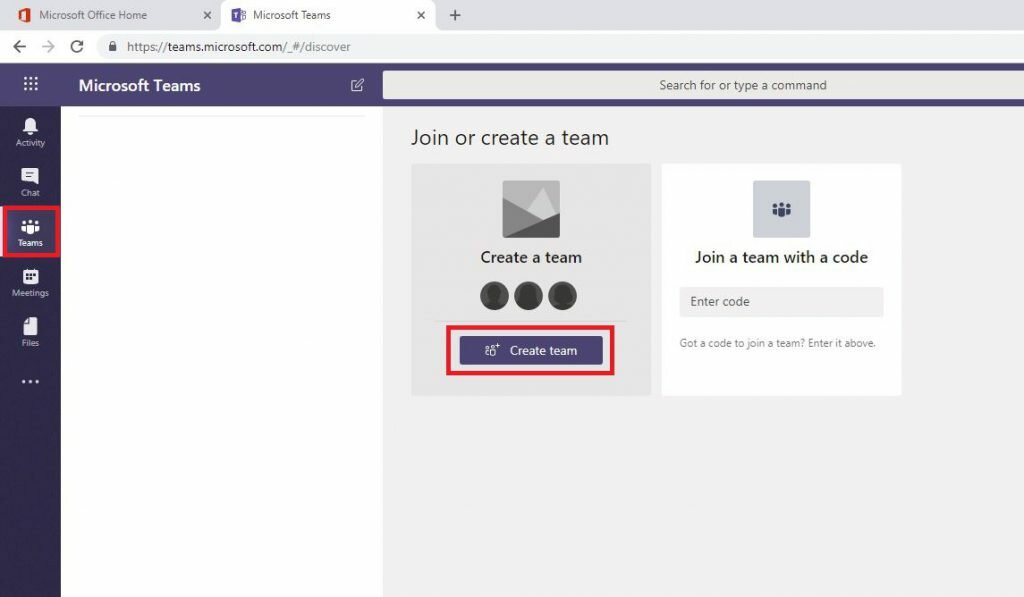
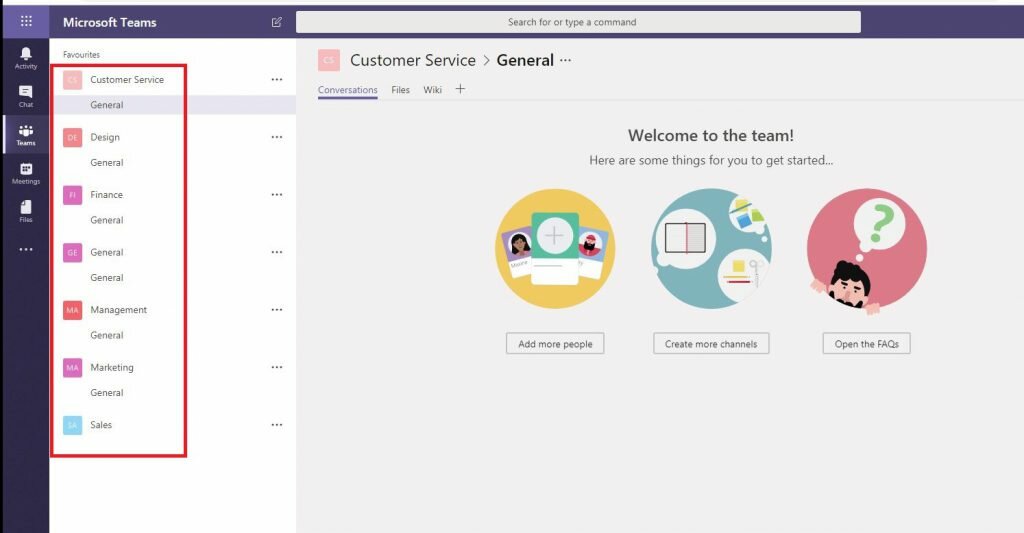
2. Mirror your folder structure in Office 365 Teams and set user permissions.
Log into teams as a Global administrator and create Teams which map to your file shares or folders.
While configuring your Teams you can add users to them or choose to do this last to stop employees from making changes. While the sync process runs over the course of a few days it will overwrite any changed or new files. In most cases its best to add employees to the Teams as the last step in the migration process.
3 . Setup mapped drives to the source files.
This migration method will copy all of the files from the server / NAS shares to the local C drive into One Drive to be synced to the cloud. This means you will need a PC on the network you can have exclusive use of over the duration of the migration. I usually deploy a new PC to site with a hard drive large enough to store a copy of all the files held on the server / NAS.
On the migration PC setup mapped drives to the Server or NAS shares and set them to reconnect at logon just in case the PC gets rebooted.

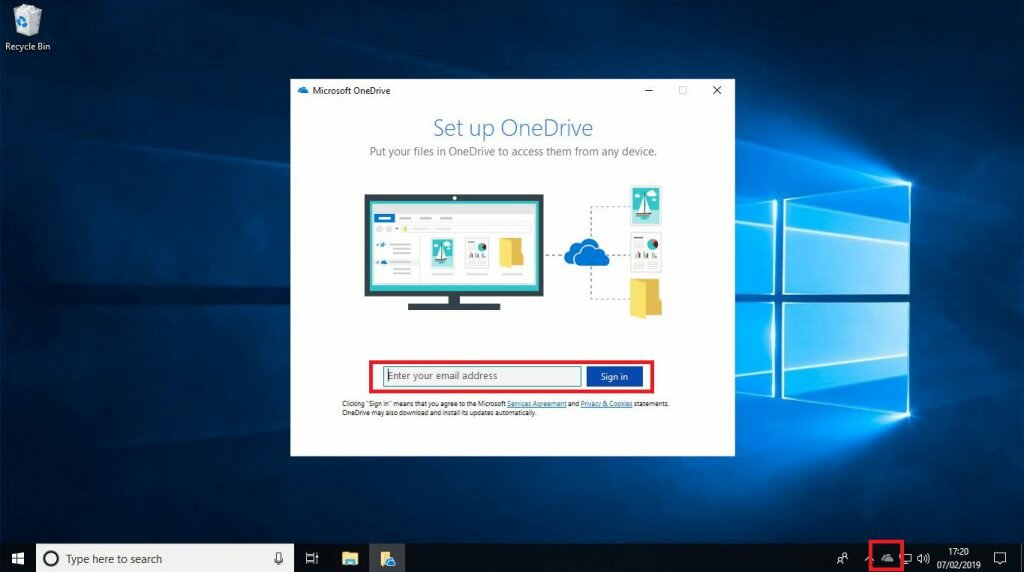
4. Connect One Drive to each Team site.
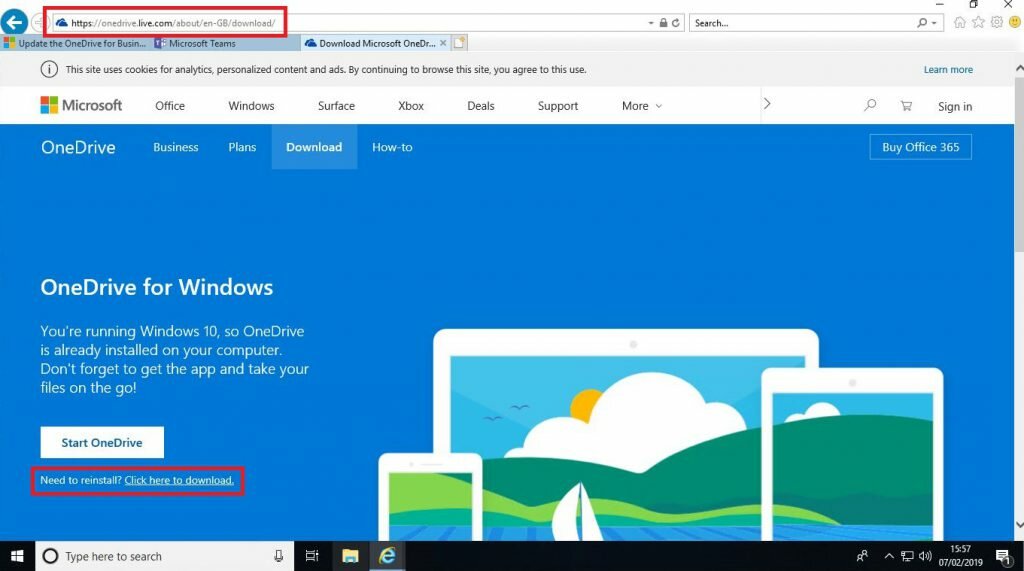
On the migration PC run all of the Windows updates and keep running the updates until there are none left. Also install the latest version of OneDrive from: https://onedrive.live.com/about/en-GB/download
Sign into OneDrive as the Global Admin account.
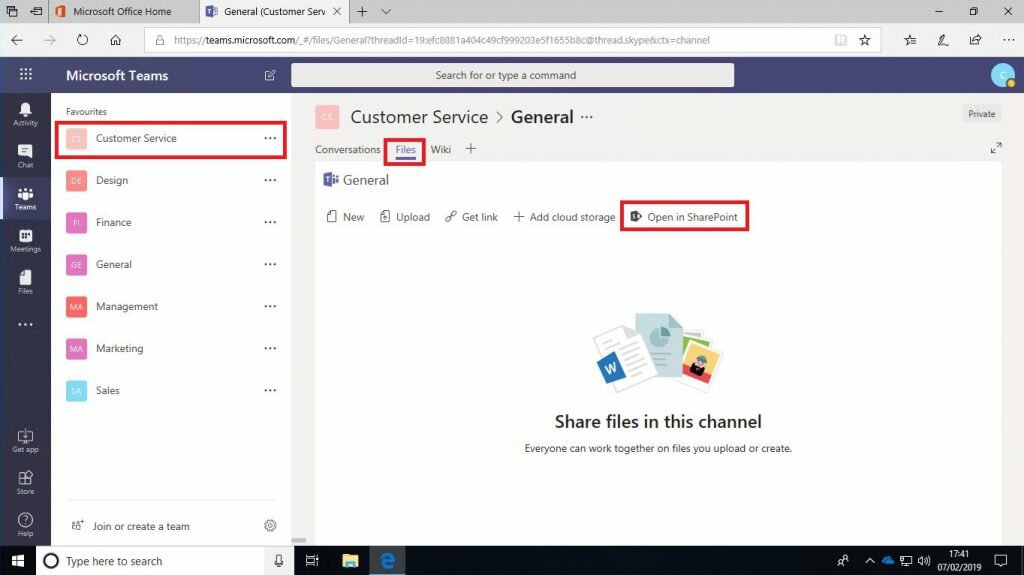
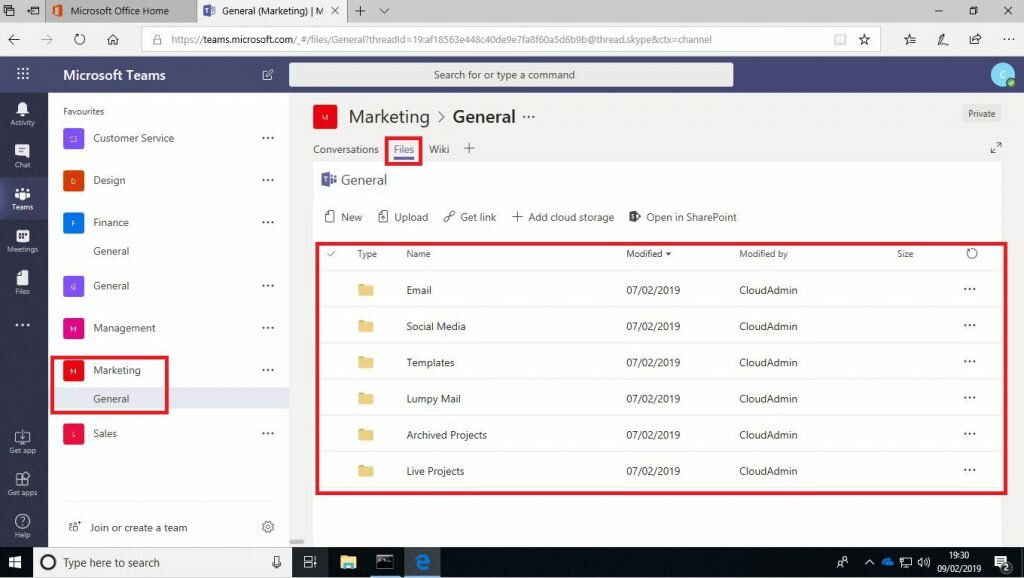
Log into Teams and on each Team click on ‘Files’ then the ‘General’ channel then ‘Open in SharePoint’.
Click on Sync and confirm any warning messages and sync each team site to OneDrive.
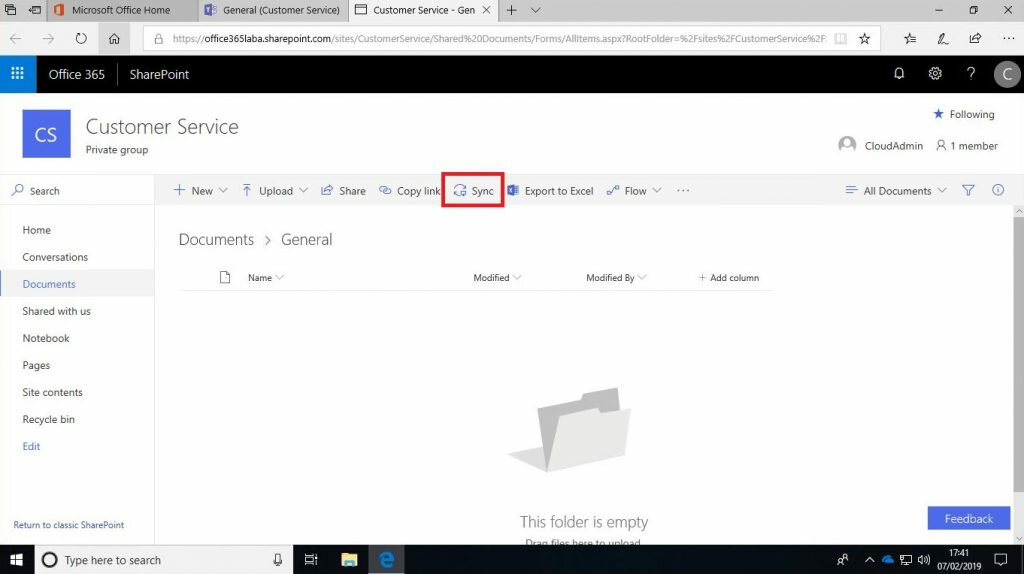
Ensure all of the Teams are synced locally to OneDrive.
5. Run the file sync.
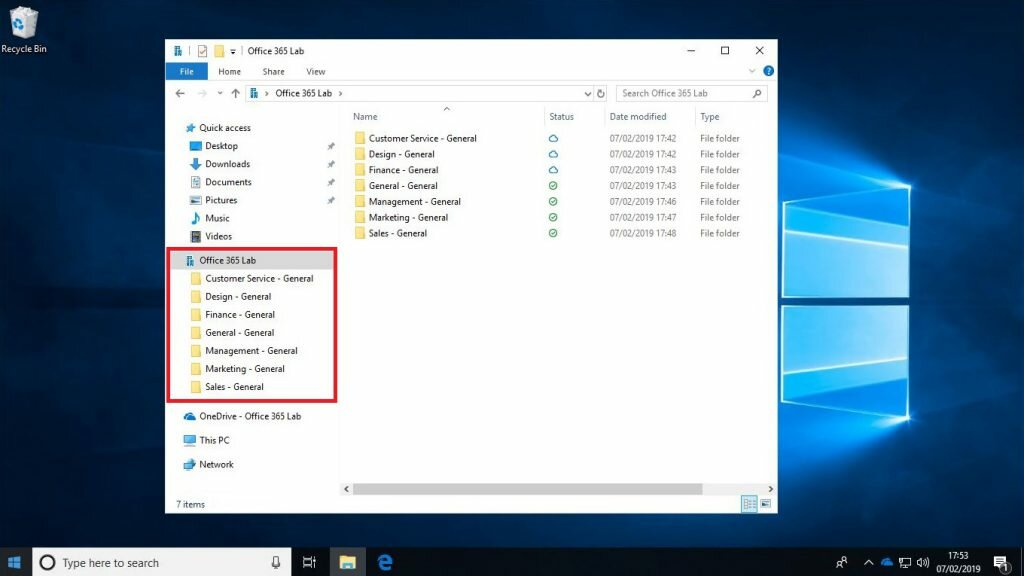
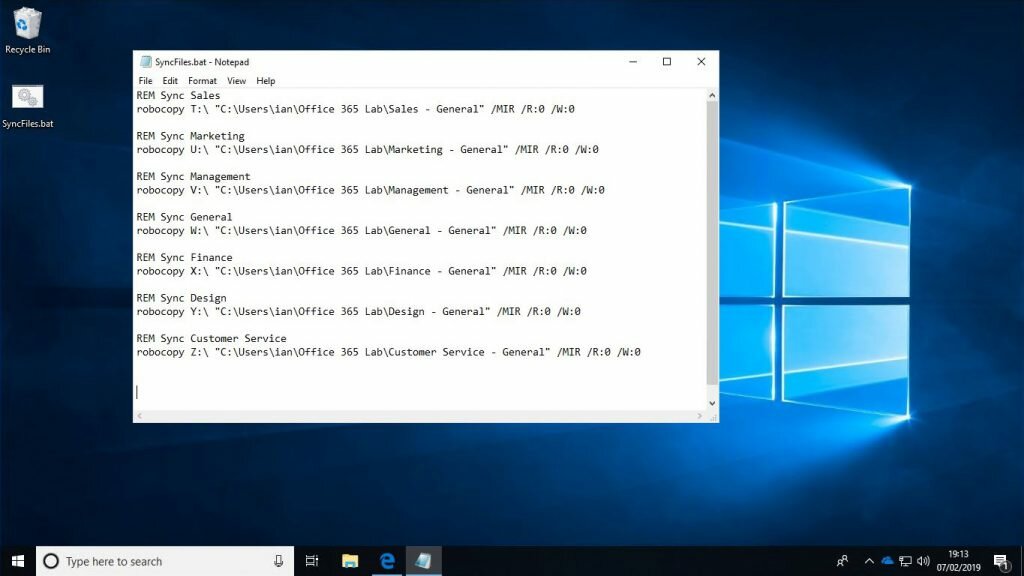
On the migration PC create a batch file on the desktop called FileSync.bat. For every file share you will be syncing add a robocopy mirror command into the file.
Below is the example used in my demo lab. You can see that each robocopy command copies all of the files from the mapped drive into the OneDrive location on the C drive. The /MIR command tells robocopy to make the OneDrive location identical to the mapped drive every time it runs. This teams any changes made in Teams or OneDrive will get overwritten each time the batch file is run. /R and /W tell robocopy to skip any files with errors or which may be locked at the time.
REM Sync Sales
robocopy T:\ “C:\Users\ian\Office 365 Lab\Sales – General” /MIR /R:0 /W:0
REM Sync Marketing
robocopy U:\ “C:\Users\ian\Office 365 Lab\Marketing – General” /MIR /R:0 /W:0
REM Sync Management
robocopy V:\ “C:\Users\ian\Office 365 Lab\Management – General” /MIR /R:0 /W:0
REM Sync General
robocopy W:\ “C:\Users\ian\Office 365 Lab\General – General” /MIR /R:0 /W:0
REM Sync Finance
robocopy X:\ “C:\Users\ian\Office 365 Lab\Finance – General” /MIR /R:0 /W:0
REM Sync Design
robocopy Y:\ “C:\Users\ian\Office 365 Lab\Design – General” /MIR /R:0 /W:0
REM Sync Customer Service
robocopy Z:\ “C:\Users\ian\Office 365 Lab\Customer Service – General” /MIR /R:0 /W:0
Pause
Now run the batch file to perform the initial sync. All of the files in the shares will be copied to the local migration PC and OneDrive will being to sync the files into Teams.
You can should run the batch file over a few days to ensure all files are copied and on the day of the switch over run one final sync. Every sync after the first one will only update files which have changed on the mapped drives, it wont do everything each time.
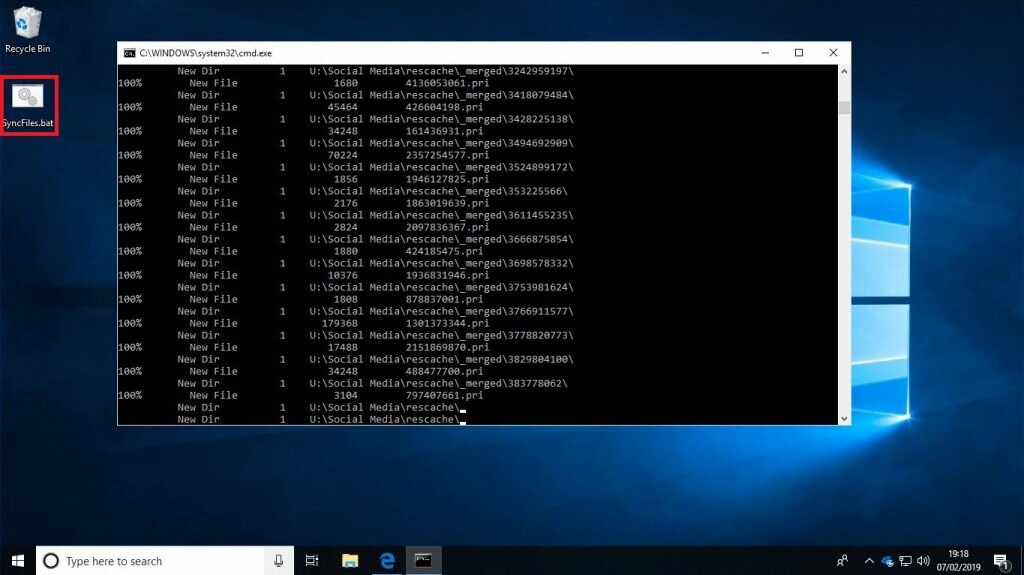
Once the files start moving into OneDrive it will start syncing them into Teams. You can monitor its status by clicking on the OneDrive icon in the system tray.

6. Resolve sync errors.
Monitor OneDrive for any sync errors. Sometimes you will see files with non compatible file names or even unsupported file types. You will know there are issues because in OneDrive there will be a red circle indicating a problem in that folder. If you have any unsupported file names or file types fix the problem on the server or NAS drive and run another sync. Unsupported file types will have to be removed or stored outside of Teams.
On the Migration day to a final sync and all of the files will be available in Teams for employees to start using.
7. Once complete don’t forget to block access to the server or NAS so that employees don’t get confused and try to save files there by mistake.
Leave a Reply