
Welcome to my in depth guide to setting up a Unifi cloud controller in Azure. If you love the great value Ubiquity products offer but want centralised cloud management like you get with Meraki products then Unifi wifi points, firewalls and switches combined with a cloud controller hosted in Azure make for a killer solution especially for the MSP’s out there looking to manage a large number of sites and devices.
Configuring a cloud controller in Azure is a fairly straight forward process but to ensure you have a successful deployment. And to ensure you avoid the mistakes I made made the following steps give a detailed step by step guide. Follow it exactly paying attention to all the notes in each step.
The steps are broken down into the following sections:
- Deploy a Virtual Machine (VM) into Azure.
- Configure VM daily backups.
- Install 32 bit Java RTE.
- Install 64 bit Java RTE.
- Install and configure controller software.
- Configure controller to start as a service.
Lets get started!
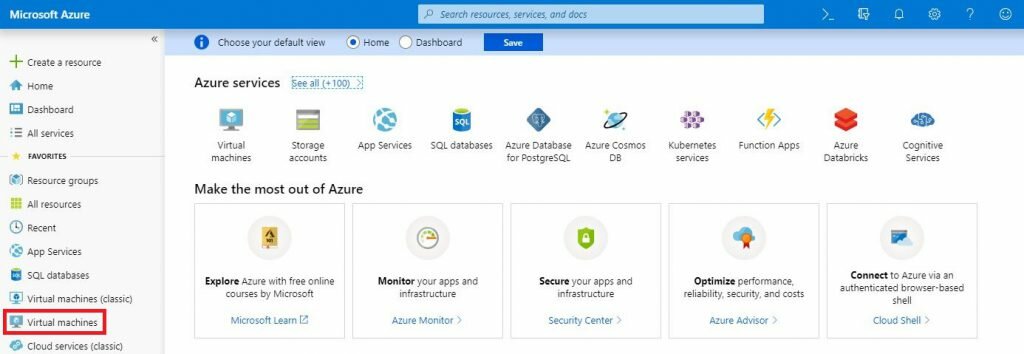
1. First things first sign into Azure and create an account if necessary and click on ‘Virtual machines’ from the left hand menu.
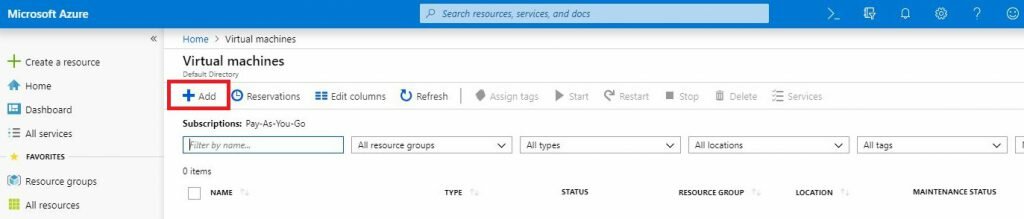
2. Click on ‘Add’.
3. Set the details as shown, Click ‘Create new’ to set a new resource group and set the Region to your location. Scroll down the options and continue configuring the basic options.
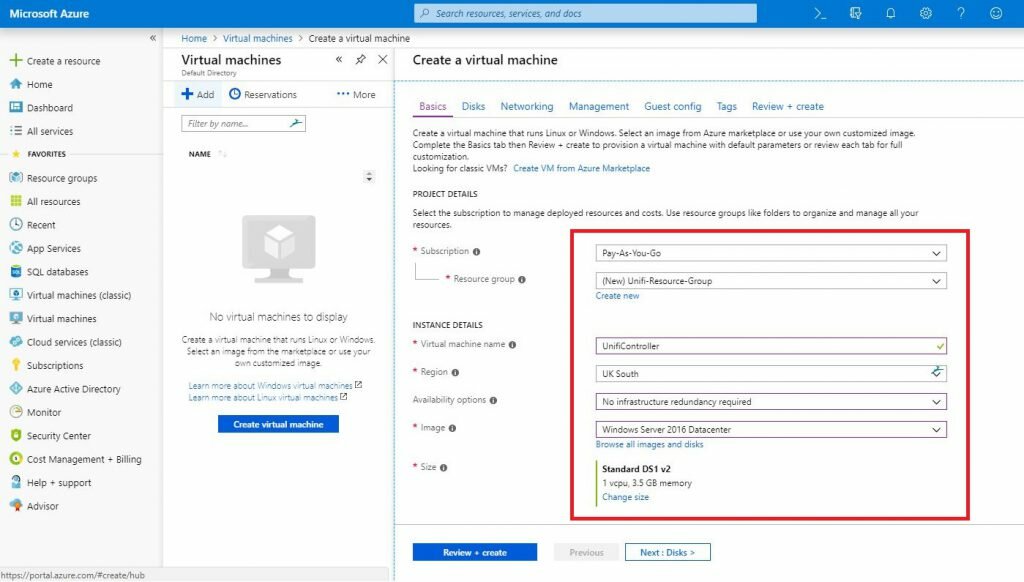
4. Set the username and password which will be used to access the Windows Server VM.
Click on ‘Review + create’.

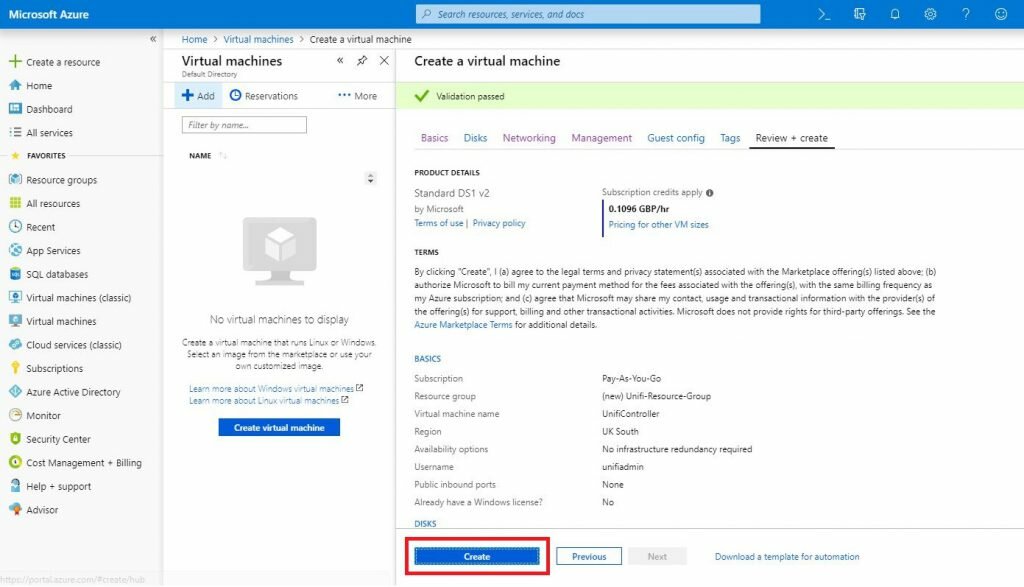
5. Check over the options and click ‘Create’.
6. Wait for the VM deployment to complete, sometimes this can take a few mintues. Once complete click on ‘Go to resource’.

7. Scroll down the middle menu panel and click on ‘Backup’. Here you will configure a daily backup of the VM. If the VM error become corrupt or something goes seriously wrong after a windows update this will enable you to roll the VM back to a working version within a few minutes.
Select ‘Create New’ and create a new ‘Resource group’ and ‘backup policy’.
Click ‘Enable Backup’.

8. Click ‘Networking’ from the center menu panel and click on ‘Public IP’.

9. Click on ‘Configuration’ and set the option to for ‘Assignment’ to ‘Static’.
Click ‘Save’.

10. Click ‘Networking’ then click on the ‘Network Interface’.

11. Now we will set the local IP address of the server to be static so it stays the same all the time.
Click on ‘IP Configuration’ then click on ‘ipconfig1’.

12. Set the ‘Assignment’ to ‘Static’ and click ‘Save’.

13. Return to the VM settings menu and click on ‘Networking’ then ‘Add inbound port rule. Here you will allow connections from the internet to the VM required by the Unifi controller software to operate correctly.

14. There are several ports to open, the first is RDP which will allow you remote access to the VM so you can login to install and configure the software.
Follow the settings as shown here but replace the ‘Source IP’ to the public IP address of your office. This adds some additional security by stopping random people or bots trying to hack into your server over the internet. You can set the ‘Source IP’ to ‘Any’ if you wish just be aware if you have a weak password it will likely get broken into.

15. Repeat the last step and add the following inbound ‘security rules’.
For additional security you can set the ‘Source’ IP for port 8443 to your office Public IP address. This port allows access to the configuration web page of the controller. The Unifi controller software does have 2FA support but restricting access to specific IP addresses is a good idea.
Keep all other ports open so that devices can communicate from any location, especially if you are an MSP or manage multiple sites.

16. Now the VM is configured in Azure it’s time to connect and configure the Unifi controller software.
You can now directly connect to the VM using remote desktop to the public IP address shown in step 8. You can also connect from the VM menu by clicking on ‘Overview’, ‘Connect’ then ‘Download RDP File’.
Download and run the file and it will connect you to the VM.
Use the username and password you set in step 4 if it prompts for credentials.

17. If all is well you will connect to the VM. Give it a minute to fire up ‘Server manager’.

18. Now we need to ensure the firewall notifies us when it block an application from opening ports. We are doing this to make configuring the firewall easier but you can open the same ports from step 15. You can also create a program exception for both the 32 and 64 bit versions of Java.
I find it easier to enable firewall notification’s and unblock them when prompted. To do this click on ‘Local Server’ and then ‘Windows Firewall’.

19. Click on ‘Change notification settings’.

20. Tick the check boxes to ‘Notify me when Windows Firewall blocks a new app’ and press ‘OK’.

21. Do yourself a favor and install the Chrome browser to the server and set it to be the default browser. Internet explorer will not work out of the box.
https://www.google.co.uk/chrome
22. Next download the latest version of the Unifi Controller
https://www.ui.com/download/unifi/
Download the installer to the servers desktop: ‘UniFi SDN Controller for Windows’

23. Next download both the 32 bit and 64 bit offline installers for Java. At the current point in time only version 8 is supported. Download the latest release for version 8 as shown.
https://www.oracle.com/technetwork/java/javase/downloads/jre8-downloads-2133155.html

24. OK you have all of the installers required.
First run the 32 bit installer for Java accepting all default options.
Next run the installer for the 64 bit version of Java again accepting all default options.

25. Next run the Unifi Installer package and click ‘Install’.

26. UN-TICK / Clear the tick box to ‘Start UnFi Controller after installation’. We don’t want to start up the controller just yet.
Click ‘Finish’.

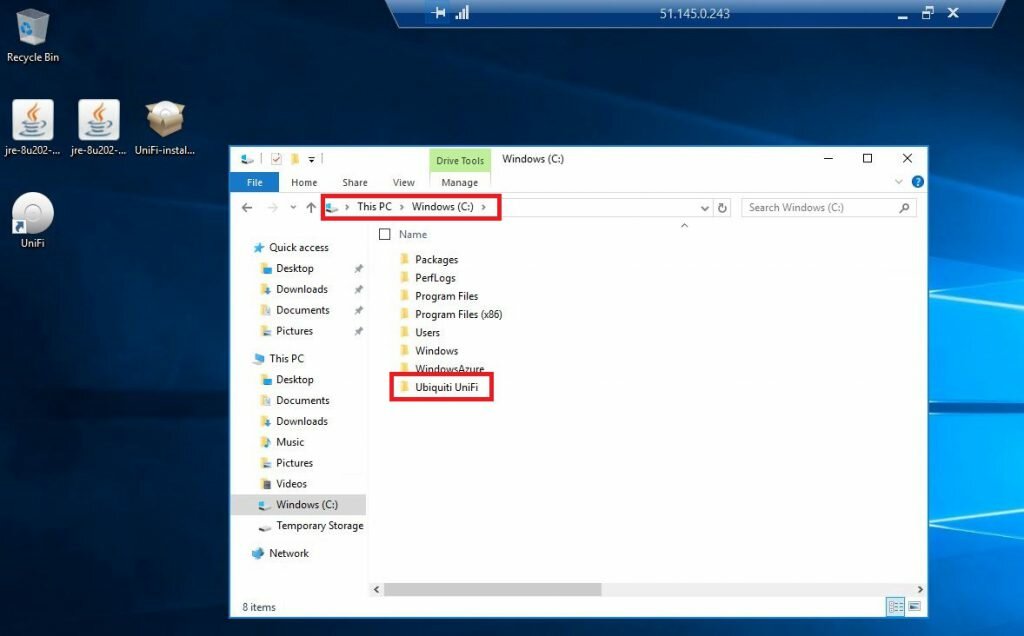
27. Someone thought it was a good idea to install the files for the controller software in the users profile path! You need to move it to the route of the C drive.
Locate the ‘Ubiquiti UniFi’ folder in ‘c:\users\\’.
Right click the ‘Ubiquiti UnFi’ folder and click ‘Cut’.

28. Paste the folder into the root of C:\ as shown.
This folder holds all of the files to run the controller including the database and automatic software updates we will configure later.
29. Moving the folder breaks the desktop icon so Right click the icon and click ‘Properties’.
Edit the paths in ‘Target’ and ‘Start in’ as shown and press ‘Apply’.

30. Click on the ‘Change Icon’ so you can restore the Unfi icon.

31. Click ‘Browse’ and navigate to ‘c:\Ubiquity Unfi\’ and select the icon file and click ‘Open’.

32. Now click on the Unifi desktop icon to startup the controller software.

33. Windows Firewall should prompt you to allow Java to open the ports required. Tick both boxes shown and click ‘Allow access’.

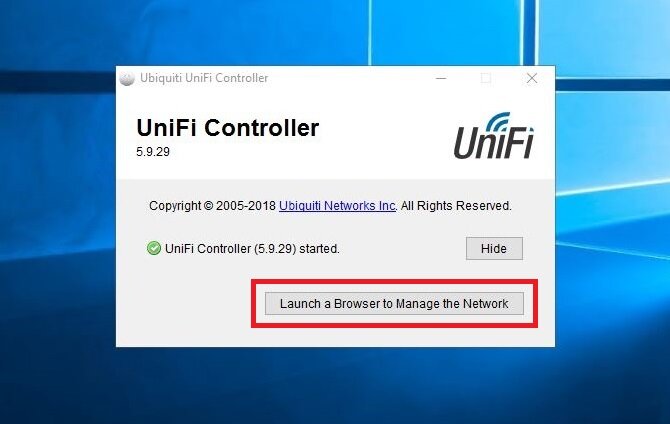
34. After a minute or so the controller should start, click ‘Launch a Browser to Manage the Network’.
35. The UniFi setup wizard will launch, set your country location and timezone and enable ‘Auto Backup’ and click ‘Next’.

36. We wont configure any devices yet, just click ‘Next’.

37. We wont configure any WiFi connections yet so click ‘Skip’.

38. Here you specify the logon credetials to the web portal and below that the username and password which will be required to access and configure devices you add to sites, WiFi points, switches and firewalls etc.
Set the options and click ‘Next’.

39. Check over the configuration details and click ‘Finish’.

40. Here you can link the cloud controller to your ubnt.com account if you have one but just click ‘Skip’ if you are not familiar with this feature since its not required.

41. The controller is now up and running but lets configure a few important options.
Click ‘Settings’ from the three dot menu as shown below.

42. Select ‘Maintenance’ from the menu and configure the ‘Data Retention’ settings as sown and click ‘Apply Changes’.
These options define how much data the controller will keep for traffic statistics. Trust me you will save yourself hassle later by setting these options as low as possible. If you really need to see traffic graphs for the last week in 5 minute increments you can increase the values at a later date.
Just be aware that this dramatically increases the size of the database and its just gets worse the more devices you add.
Its not just a storage issue but also the more statistics you save the larger the database becomes and the longer the software takes to startup. Having startup problems due to large database files is a common issue to set these as shown.

43. Next click on ‘Auto Backup’ and enable the backup and set the frequency. Set the data retention to ‘Settings only’. This is done to keep the backup file sizes to a minimum and also to speed up the restore times.
Click ‘Apply Changes’.

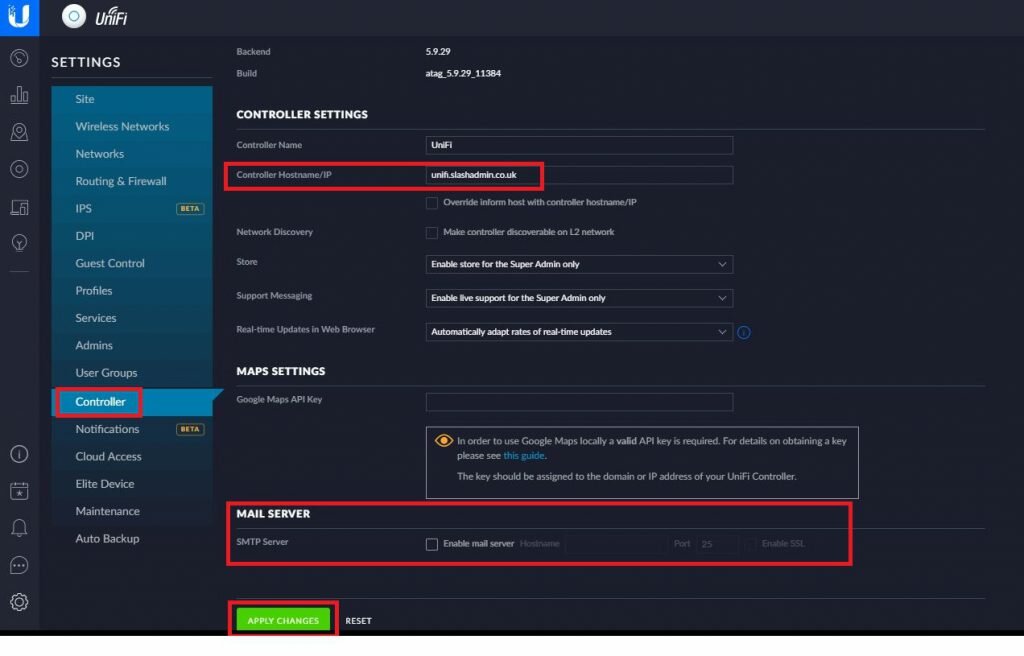
44. Click on ‘Controller’ and set the ‘Controller Hostname’ to any DNS name you will use to access your controller over the internet. Here I set it to ‘unifi.slashadmin.co.uk’. Set an A record with your domain name host to point to the controllers public IP found in step 8. Configure a mail server to receive alerts from the controller if you wish and click ‘Apply Changes’.
45. Close the controller software because now we are going to set the controller to run as a service. I have no idea why the installer doesn’t do this by default, for some reason its an optional step.
Open up a command prompt ‘as administrator’ and run the following commands:
cd “c:\ubiqui Unifi”
java -jar lib\ace.jar installsvc
java -jar lib\ace.jar startsvc
The output should look like the image below. Close the command prompt window.

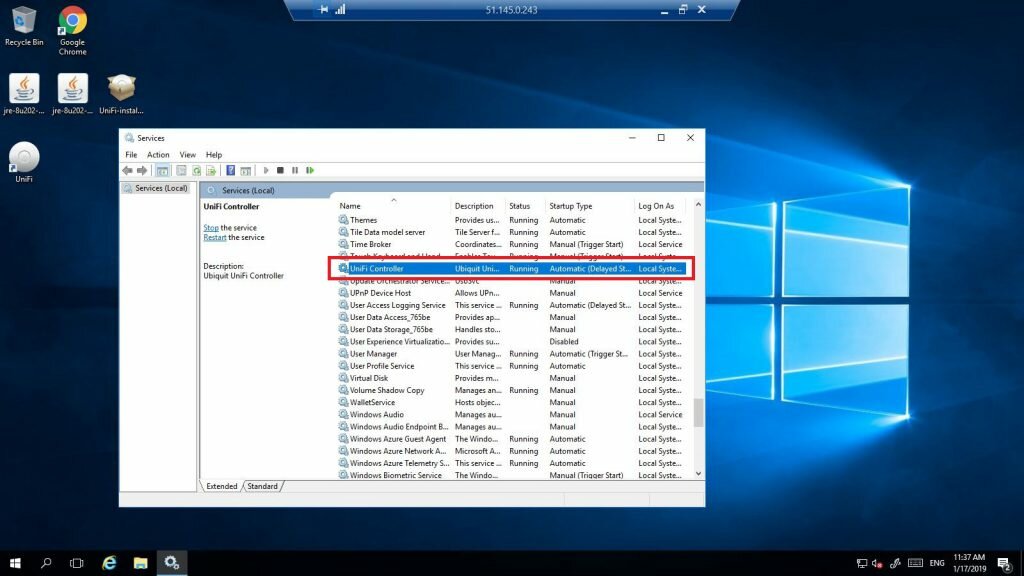
46. Open up Services and locate the ‘UniFi Controller’ service. This now runs the Unifi controller software so that even after a server reboot the controller will start up automatically.
I like to set the service to ‘Delayed Start’ so that the server has time to startup before starting the controller software.
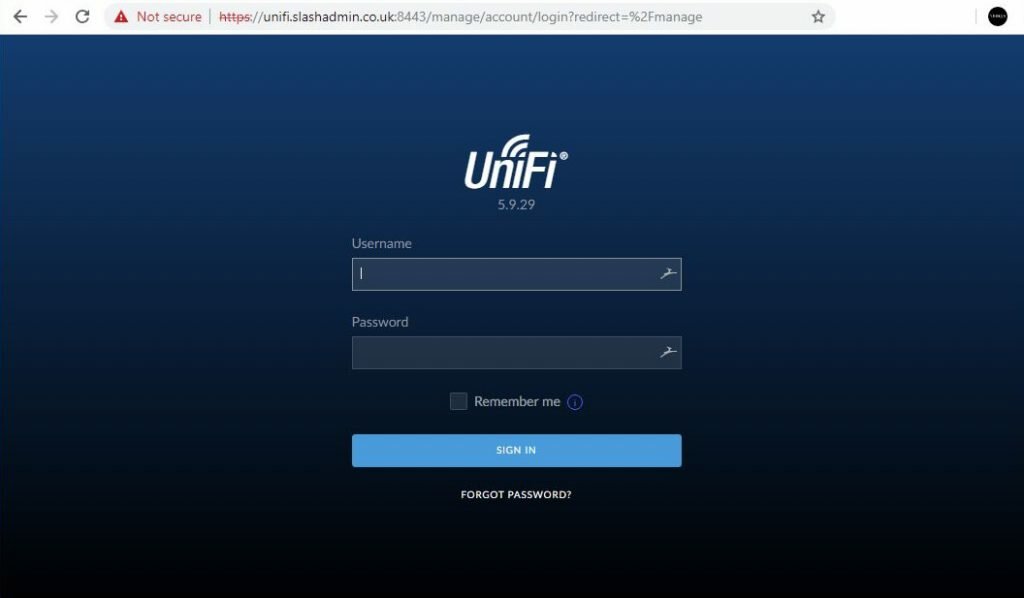
47. Now open a browser on your own computer and browse to the URL configured in step 45.
https://unifi.slashadmin.co.uk:8443
Alternatively you can use the public IP address of the VM from step 8.
https://51.145.0.243:8443
Conclusion
I hope you found this guide useful! If you have any improvements or find any fault with this guide please let me know.
Leave a comment if this helped you 🙂
Leave a Reply