
Last updated on February 13th, 2025 at 06:20 pm
There is an abundance of articles discussing how to refresh the background and lock screen images for your devices. A common inquiry is how to implement this on Windows 10/11 Pro. The reason for this interest is that while the Intune device restriction policy simplifies the addition of background/lock screen images, it is restricted to Windows Enterprise/Education SKUs. If this has led you to this article, please check this link, where we guide you through the process for Windows Pro. This article is slightly different, prompted by an organization with a specific request. They commissioned a graphic designer to create 52 custom background images reflecting their business, which they wanted to use as the lock screen and background images. The twist was their desire to rotate these images weekly, showcasing a new one each week.
Fortunately, they possessed Windows Enterprise licensing. This allows us to utilize the device restriction policy in Intune, which facilitates the process of creating and updating such policies. However, assigning a manual task to update the policy weekly is inefficient and prone to errors, especially if the responsible individual is unavailable. Hence, automation was sought. This article elaborates on how to automate the rotation of your background and lock screen images at designated intervals.
The Intune Policy
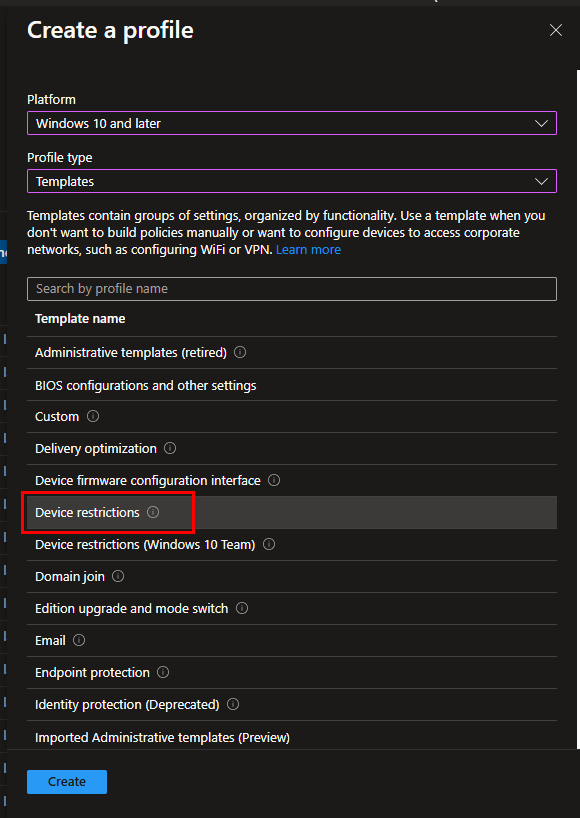
To begin, we will set up our Intune policy. Head over to Device Configuration Policies in Intune. Create a new profile and select the Device Restrictions template:
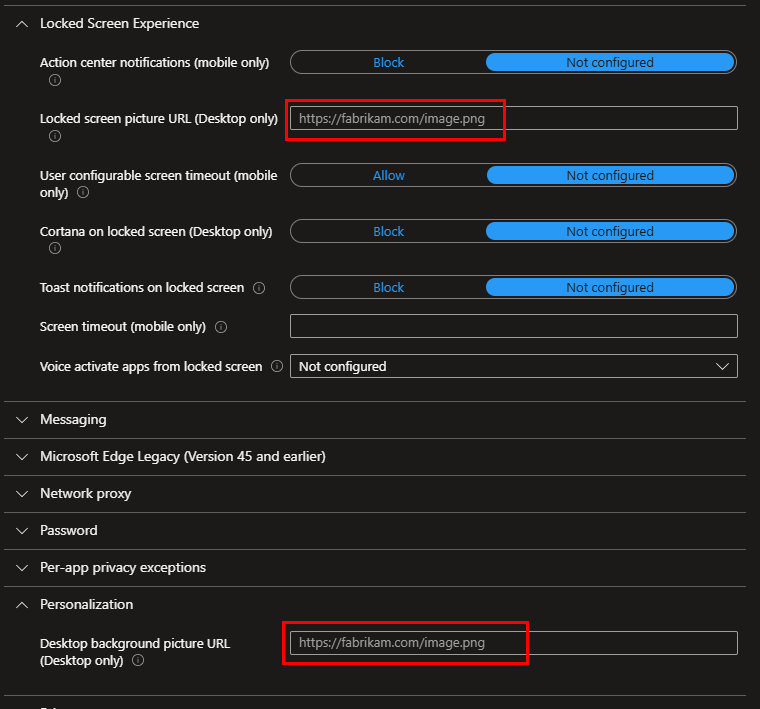
If you already have the URL for your initial image, input it in the lock screen and background fields. If not, leave these fields empty for now and proceed with the policy creation.
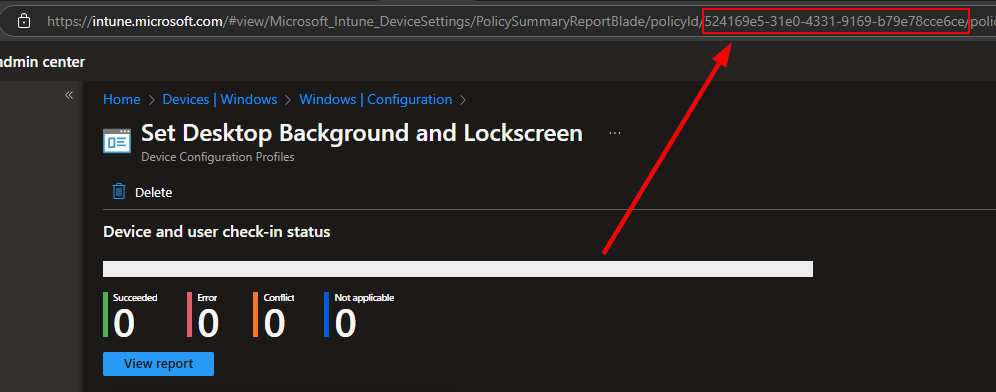
Make your assignments and finalize the policy. Once your policy is created, select it to extract the ID from the URL. Copy and save it temporarily; it will be referred to in the automation script.
The Azure Storage Account and Image Files
Next, we need to establish an Azure Storage Account to store our background images. Go to https://portal.azure.com, find storage accounts, and create a new one. For this simple setup, use the Standard SKU and select Blob storage as your primary service. Complete the storage account setup without making changes to other tabs unless necessary.

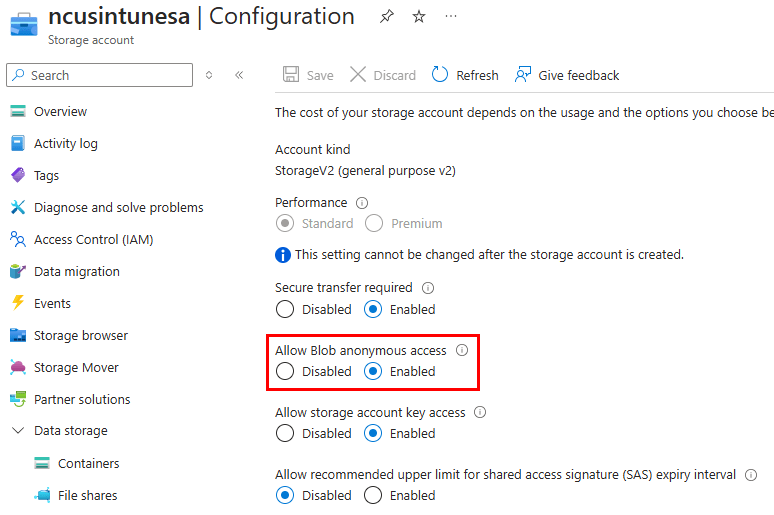
After your storage account is created, we need to enable anonymous read access to allow our endpoints to retrieve images from the container. Navigate to your storage account settings > Configuration, and set Allow Blob anonymous access to Enabled:
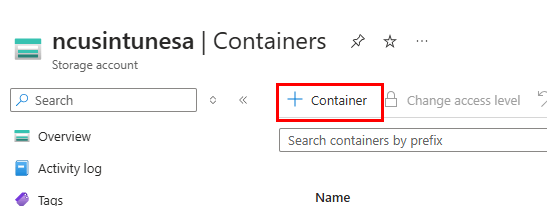
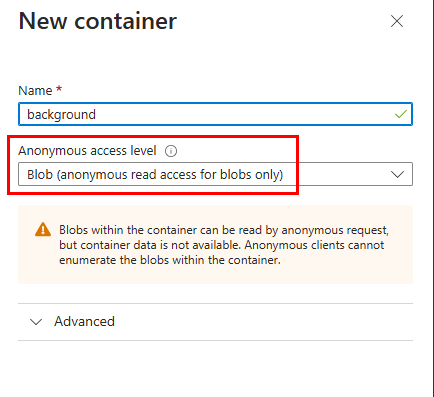
After that, create a container. Under Data Storage, select Containers and click the + icon. Provide a name, and for the anonymous access level, select anonymous read access for blobs only.
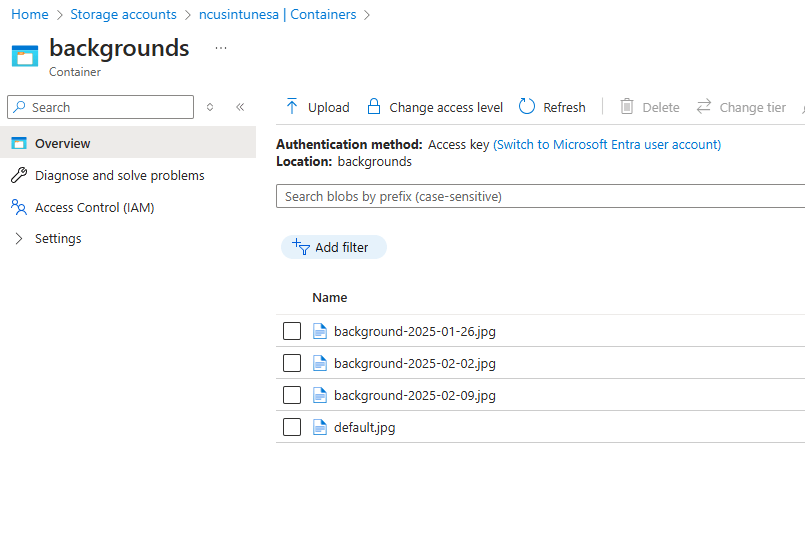
Now we can upload our image files. It’s crucial that they are named correctly before uploading. While you are free to choose your naming convention, you should use identifiable names relating to the date. I opted for “background-YYYY-MM-DD” indicating when the image should be activated—every Sunday in this instance. Our runbook script will execute each Sunday, searching for a file that kicks off with “background-” and ends with the week’s date. I also uploaded a default.jpg as a fallback; if the script can’t locate an appropriate file, it will use this default image. Here’s what my file names look like:
The Azure Automation Account
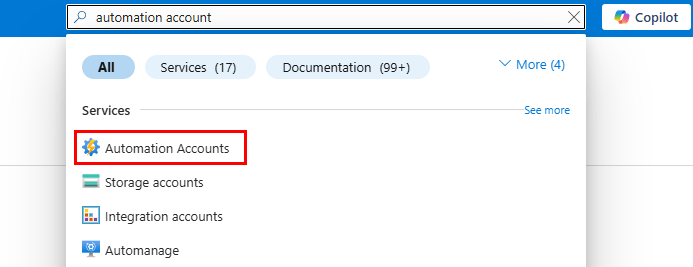
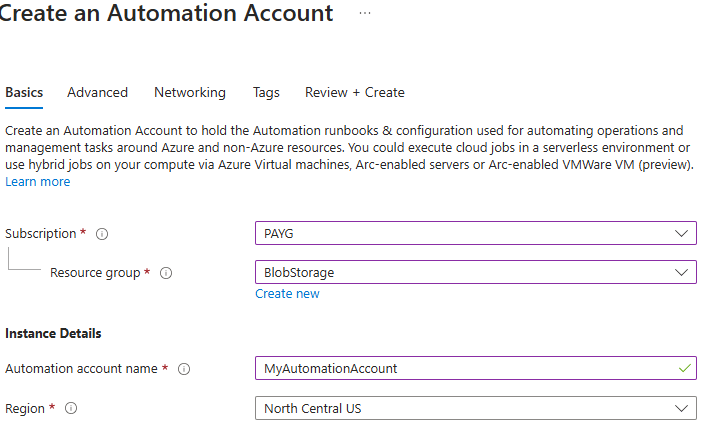
Now that we have created our Intune policy and uploaded our images, it’s time to build the system that will automate the rotation. We will use an Azure Automation Runbook for this process. Search for and select Automation Accounts
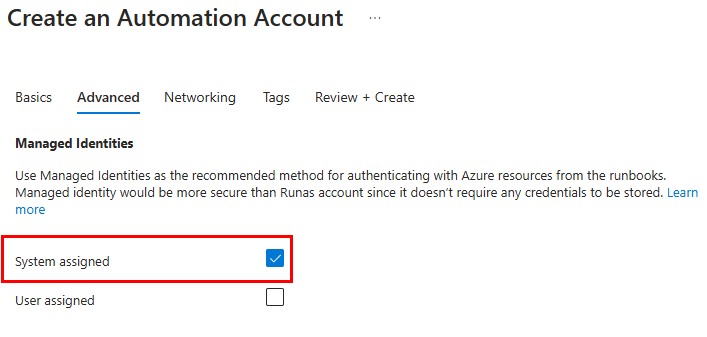
Create a new Automation Account. Fill out the required information and ensure the system-assigned managed identity option is selected in the Advanced settings:
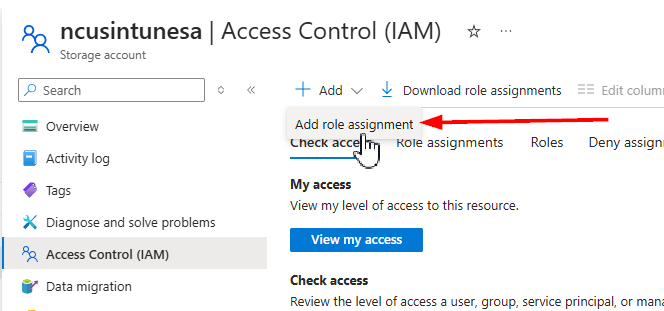
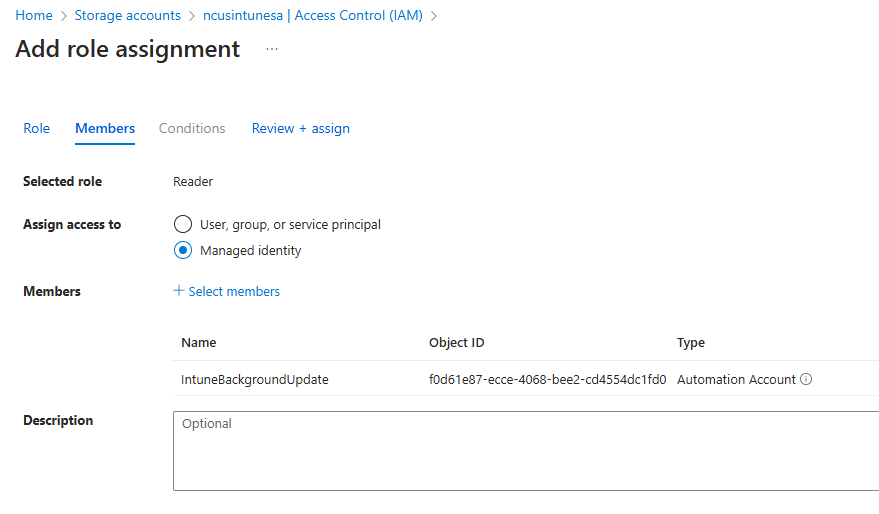
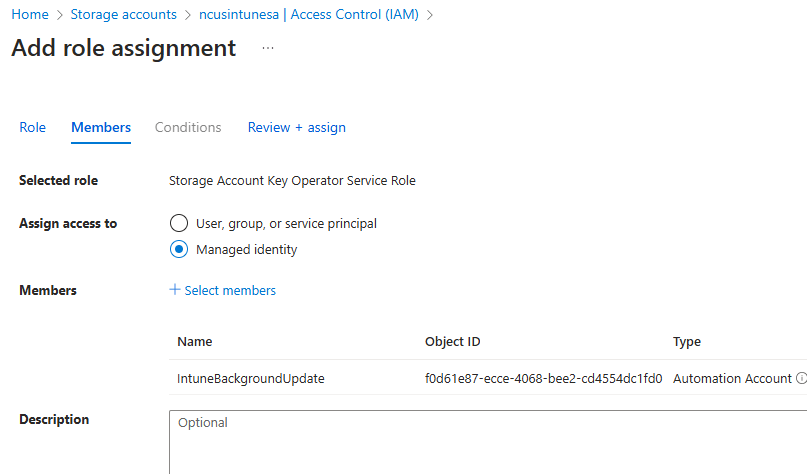
Following this, we must grant our Automation Account identity the rights to access our storage account. This allows it to list and read the contents of the container and compare those files to the date specified in our script. Return to your storage account, select Access Control, then add a new role assignment. We need to assign the Reader and Storage Account Key Operator Service roles to the automation account identity:
- Assign the reader role permissions of the automation account to the storage account
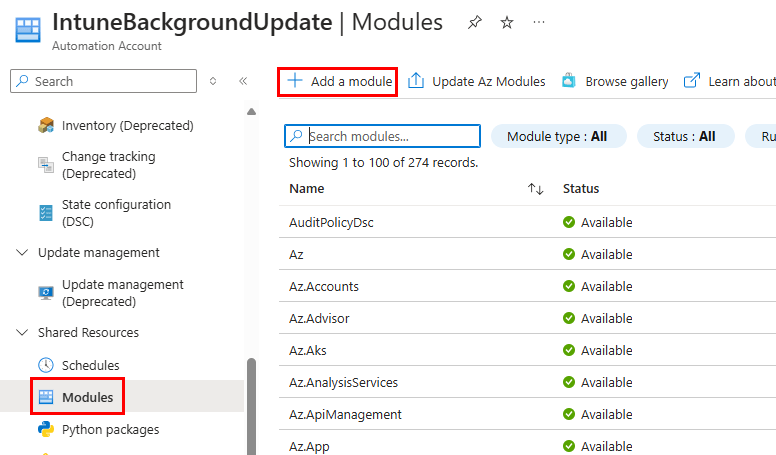
Once the role assignments are completed, return to your Automation Account. Under Shared Resources, click on Modules and then Add a module:
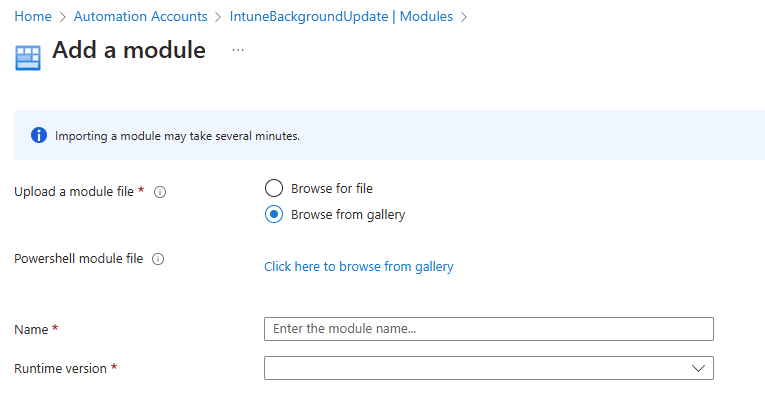
Choose to browse from the gallery:
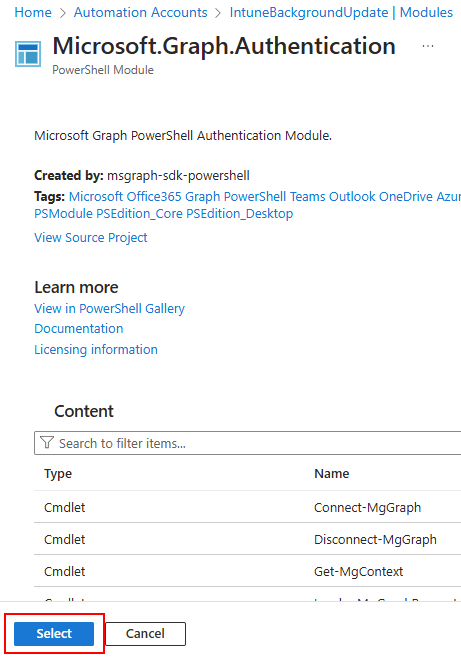
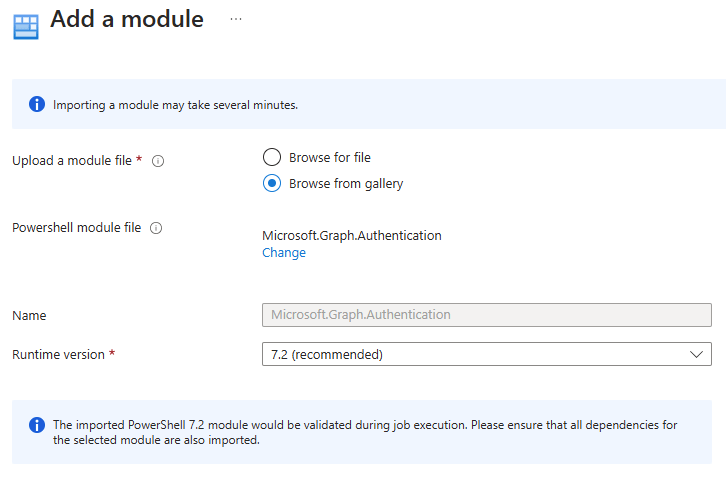
Search for and select Microsoft.Graph.Authentication:
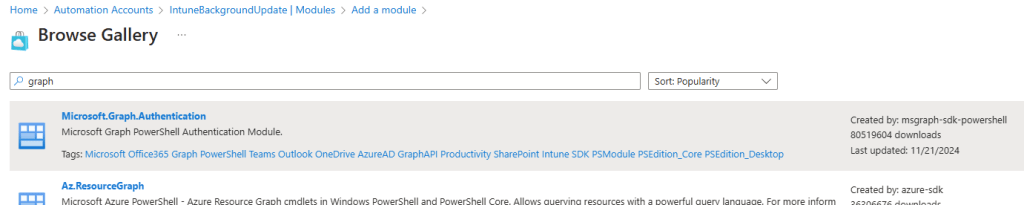
Click the select button, and when prompted for the runtime version, choose 7.2:
Thus concludes the creation of the Automation Account, the assignment of necessary permissions in Azure, and the addition of required modules for our automation account. Next, we must assign our Automation Account identity the permissions to access the Graph API and upload our Runbook script.
Assigning Graph API Permissions and Adding our Runbook
This step is critical because when an automation account connects to the Graph API, adding scopes to our script and granting consent during authentication isn’t viable. Permission assignments need to be added to the identity prior to authentication. We’ll perform this using PowerShell. Before delving into the script, retrieve your Automation Account’s ID. The simplest way to find this is through the automation account, navigating to Account Settings > Identity:
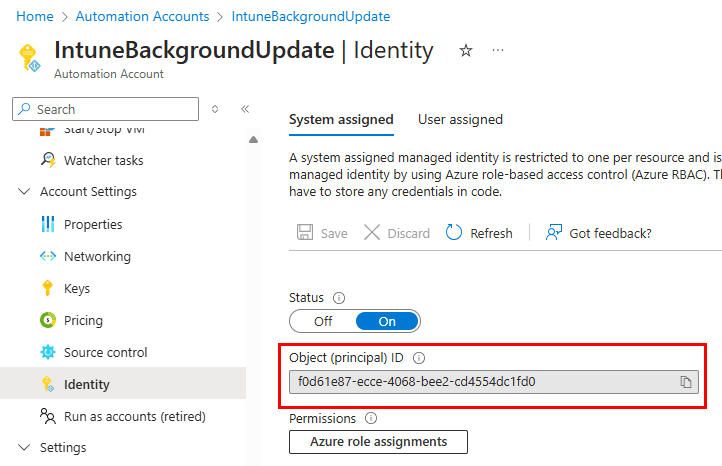
Copy your automation account’s ID to use in the script below for the $serviceprincipalId variable. The remainder of the script can be left untouched as it will perform the necessary functions. Essentially, this script searches for the permission IDs for each object identified in the permissions array, retrieves the specific permission ID, and assigns it to the automation account’s identity. This script presumes that the Microsoft.Graph.Authentication module is already installed and requires the Microsoft.Graph.Applications module. Setting these permissions will enable the automation account to modify the Intune policy during its scheduled runs.
Install-Module Microsoft.Graph.Applications -scope currentuser
Connect-MgGraph -Scopes "AppRoleAssignment.ReadWrite.All", "Application.ReadWrite.All"
$serviceprincipalId = f0d61e87-ecce-4068-bee2-cd4554dc1fd0
$permissions= @("Directory.Read.All", "DeviceManagementConfiguration.ReadWrite.All", "DeviceManagementConfiguration.Read.All")
ForEach ($permission in $permissions) {
$GraphResource = Get-MgServicePrincipal -Filter "AppId eq '00000003-0000-0000-c000-000000000000'"
$approle = $GraphResource.AppRoles | Where-Object {$_.value -eq $permission} | Select-Object Value,ID
New-MgServicePrincipalAppRoleAssignment -ServicePrincipalId $ServicePrincipalId -PrincipalId $ServicePrincipalId -AppRoleId $approle.Id -ResourceId $GraphResource.Id
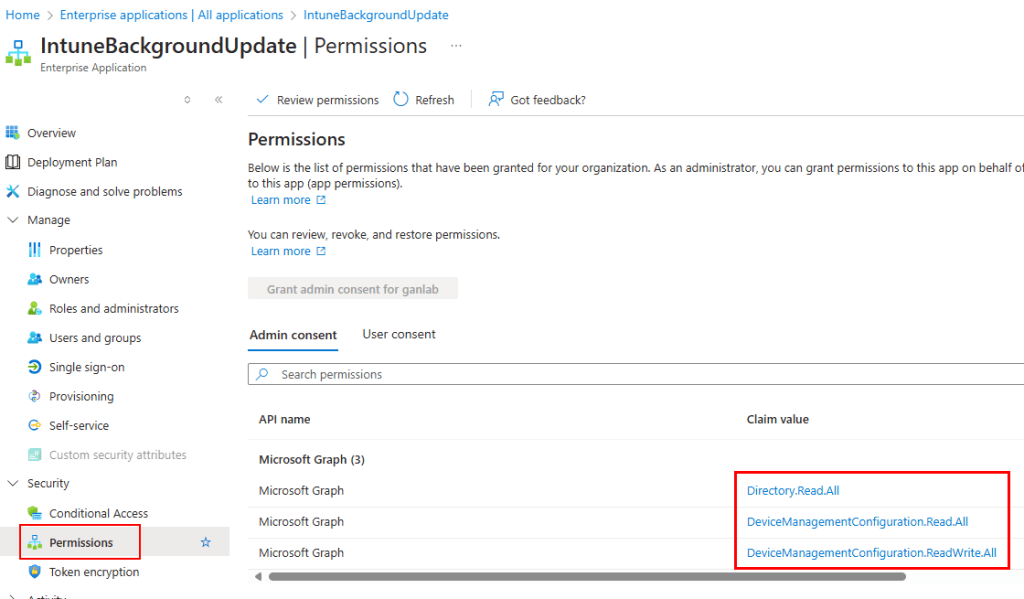
} To confirm that the permissions were set accurately, navigate to Enterprise Applications in Entra, select Managed Identities as the application type:
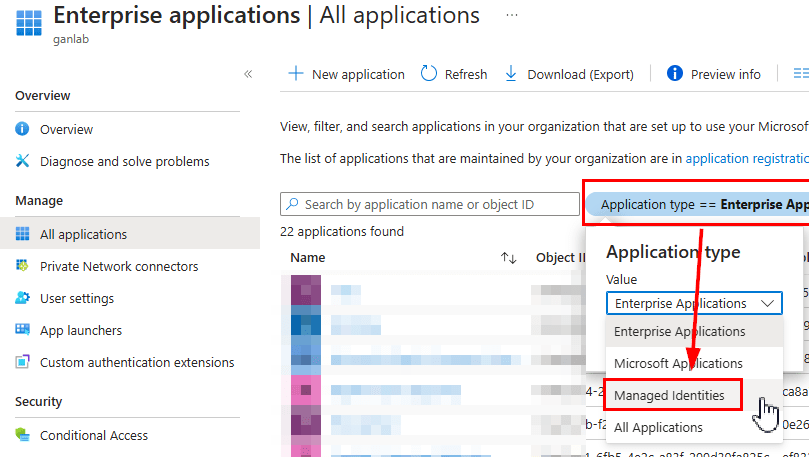
Select your Automation Account identity, then go to Security > Permissions. You should see the Graph Permissions listed below.
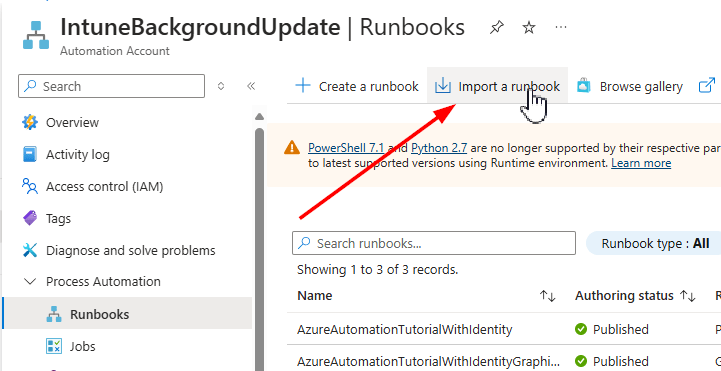
With the permissions confirmed, we can now add and test our runbook script. Download the script from GitHub. After downloading, return to your automation account, navigate to Runbooks, and select Import a Runbook:
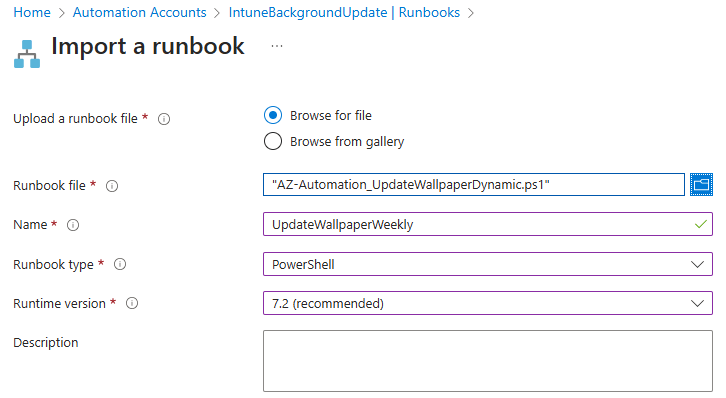
Select the option to browse for a file and locate the downloaded runbook script. Provide a name and select runtime version 7.2. Click Import to finalize the procedure.
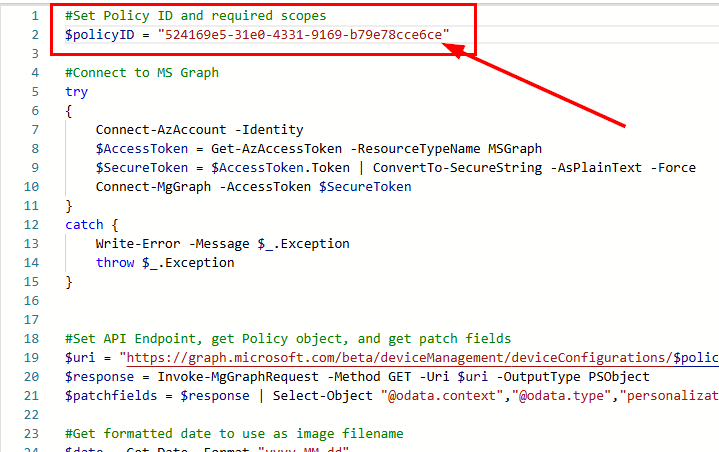
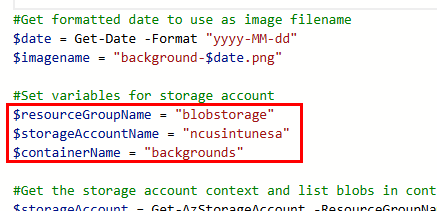
At this point, we must make minor edits to the runbook. We previously discussed the runbook’s simplicity; it connects to both Azure and MS Graph using the Automation Account identity. It retrieves the current date in the format “yyyy-MM-dd” and generates a variable for the image name using “background-$date”. The script lists and reads the names of images in the storage account container to find a match. Depending on that result, it uses a PATCH API call to update the Intune policy with either the new image URL or the default fallback image if no match is found. It’s worth noting that this script presently sets the same image for both background and lock screen; to use separate images, you’ll need to modify the script along with the image names being uploaded. Here’s what you’ll need to edit in the runbook script for your setup:
- Your Intune Policy ID
- Storage account name
- Container name
- Resource Group associated with the storage account
- URL of the blob storage account container where your images are uploaded
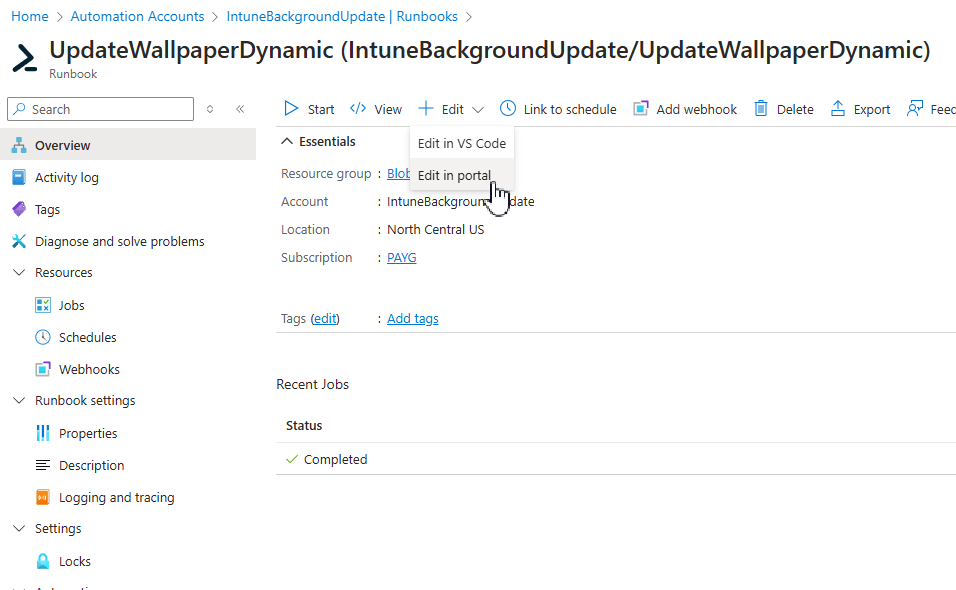
Navigate to the runbook in Azure, then click Edit at the top of the screen. For quick edits, choose the option to edit in the Portal:
In the script, input your Intune policy ID as the $policyID variable at the top:
Next, input your container name, storage account name, and the resource group of your storage account under the appropriate variables:
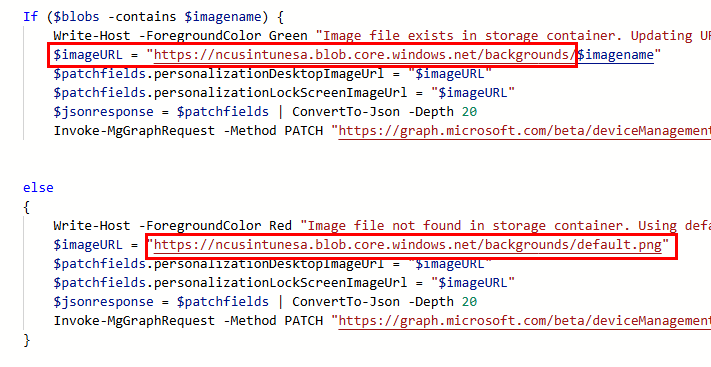
Finally, add the URL for your storage account container within the if-else statements. The else statement will use default.jpg to serve as the fallback option if no matching image is found. Remember to click the save button once you’re done editing.
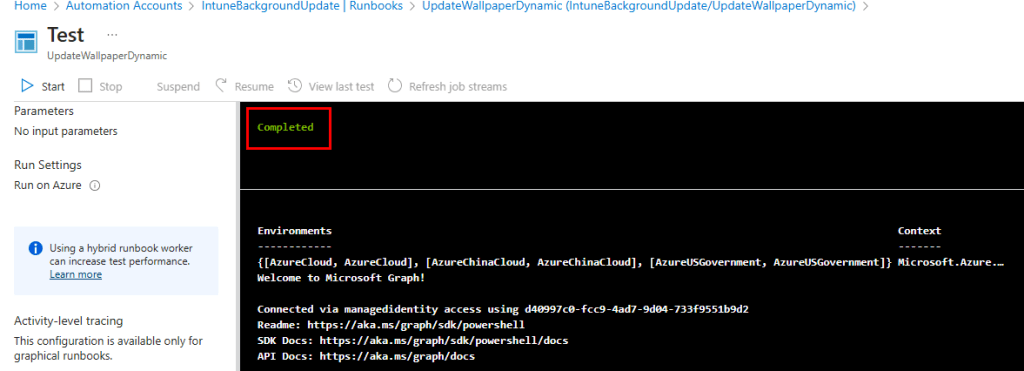
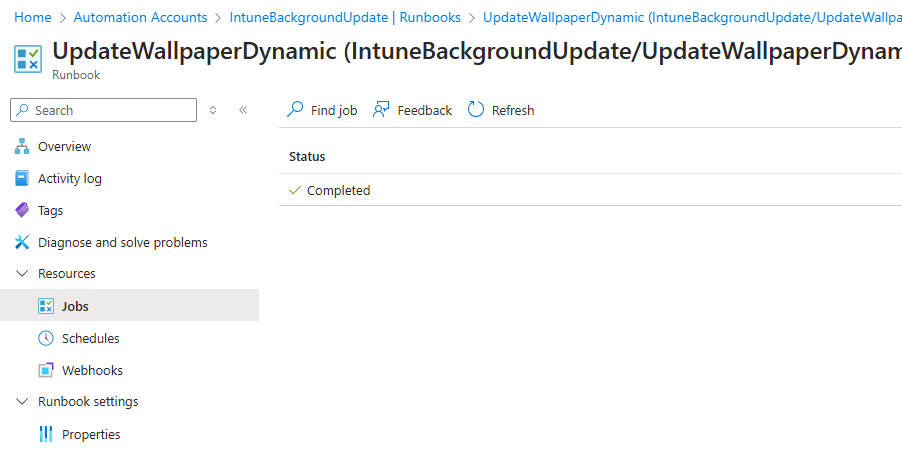
Once edits are completed, navigate to the test pane to run a test of the runbook:

A successful execution will show as completed.
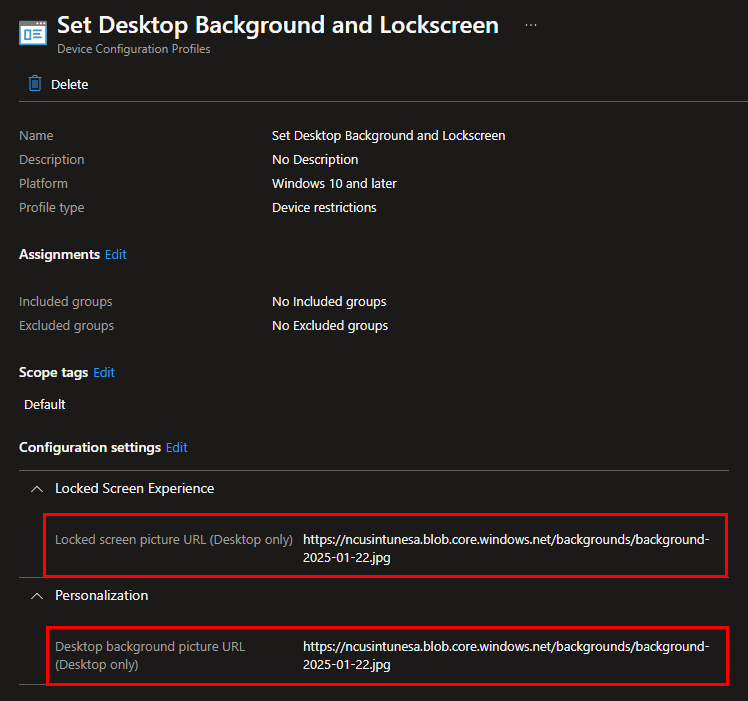
Your Intune policy should now display the image based on the current date if it exists; otherwise, it will revert to the default image.
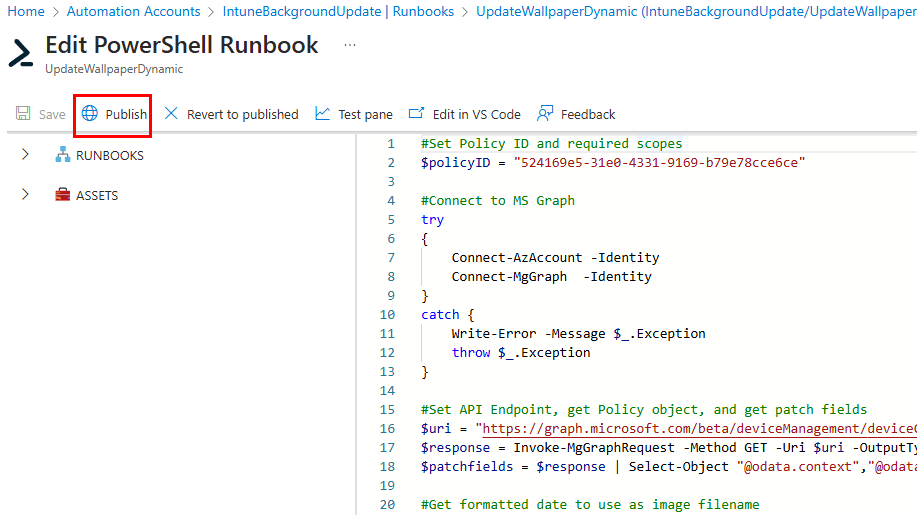
Lastly, publish the runbook and establish a schedule. From the edit runbook page, find and click the button to publish it with all the changes saved:
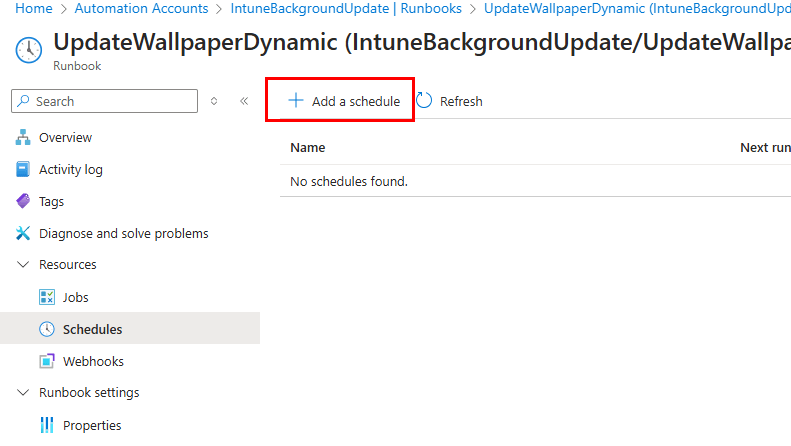
For the schedule, set it to align with the interval you want your images to rotate based on their naming convention. For instance, if you plan for the images to rotate every Sunday, which aligns with the first workday of the week, set the automation runbook to run on Sundays, with your files named accordingly, such as “Background-2025-01-26” then “background-2025-02-02”, and so forth for each Sunday (this matches the naming of our provided example images). From the Runbook, navigate to Resources > Schedules, and create a new schedule:
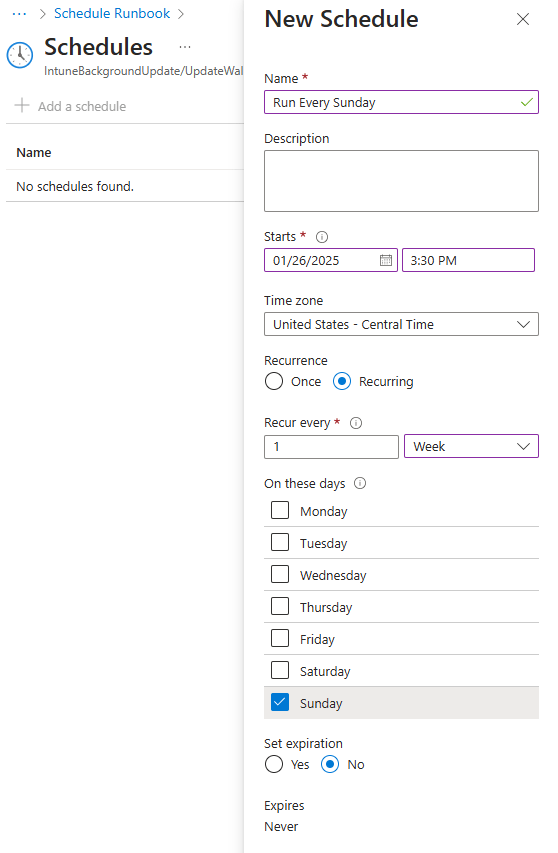
Configure your recurring schedule:
As your jobs run, you can monitor their success under the Jobs tab in the automation runbook:
Now you can relax and let the automation take care of the image rotations for you! 👍
Leave a Reply