
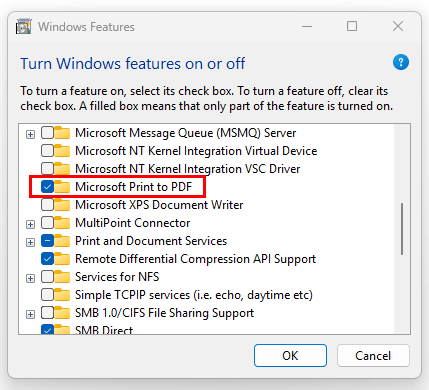
The Microsoft Print to PDF printer should come enabled by default on any Windows 11 PC. While I don’t personally use this printer and know few who do, it’s a convenient option for those who need it. If the Print to PDF printer isn’t enabled, the process to activate it through Windows features is usually straightforward:
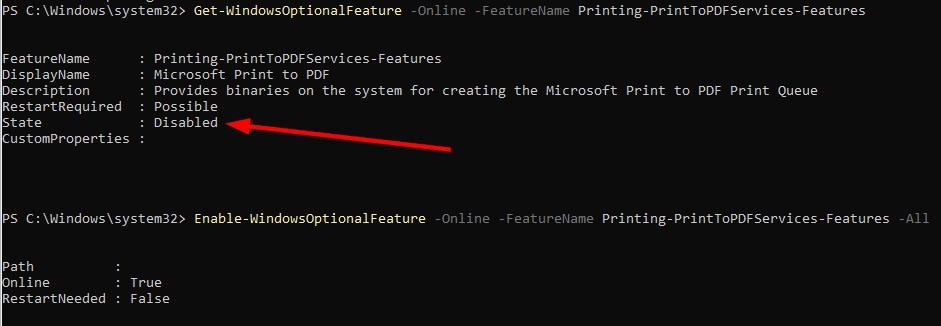
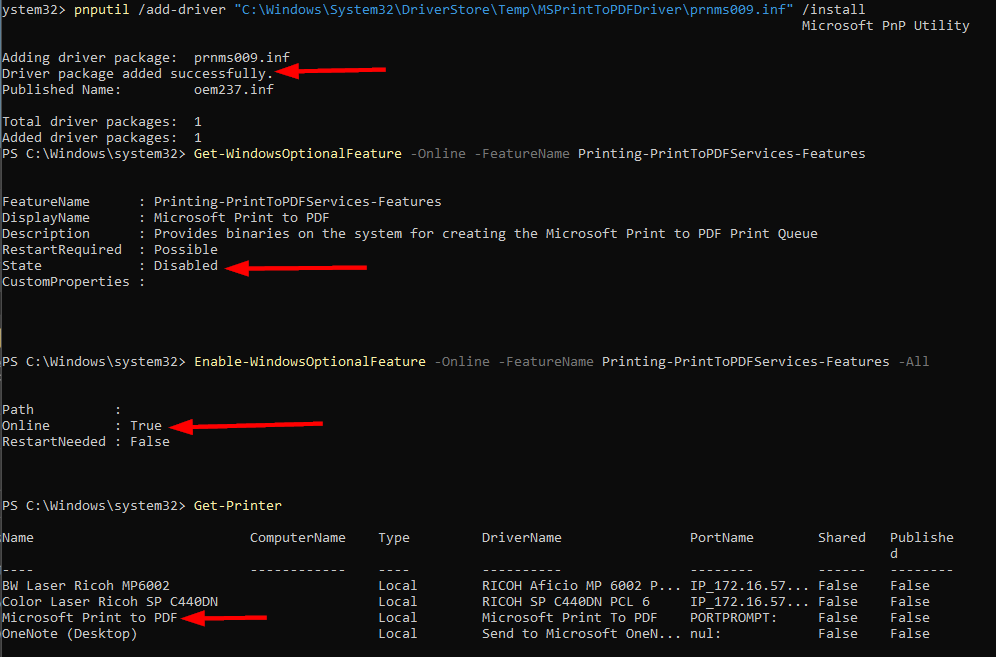
You can also check or install this feature using PowerShell. The screenshot below shows that it is currently disabled.
- To verify if the feature is installed:
- Get-WindowsOptionalFeature -Online -FeatureName Printing-PrintToPDFServices-Features
- To enable the feature via PowerShell:
- Enable-WindowsOptionalFeature -Online -FeatureName Printing-PrintToPDFServices-Features -All
Adding this feature is relatively simple. Once added, the Print To PDF driver is installed on the system. You can confirm this using the get-printdriver command:

Enabling the Print to PDF feature should automatically install the driver. If there is a problem during installation, you may encounter error code 0x800F0922, which suggests that the driver did not install correctly, likely resulting in the printer not appearing on the system.

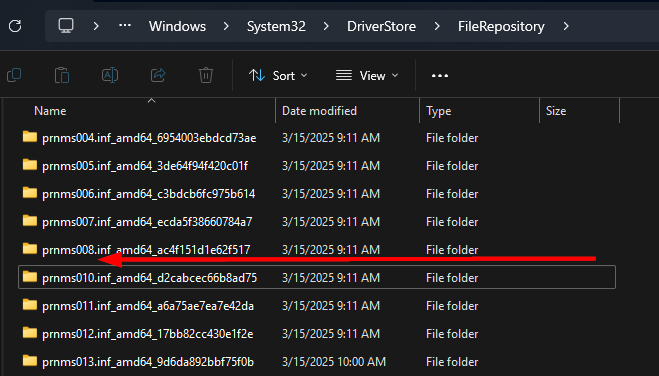
Therefore, the first step is to install the Microsoft Print to PDF driver. This driver can be found in C:\Windows\System32\DriverStore\FileRepository within a directory starting with prnms009. If the directory is missing, as shown in the example below, it suggests that the driver is not present or failed to install:
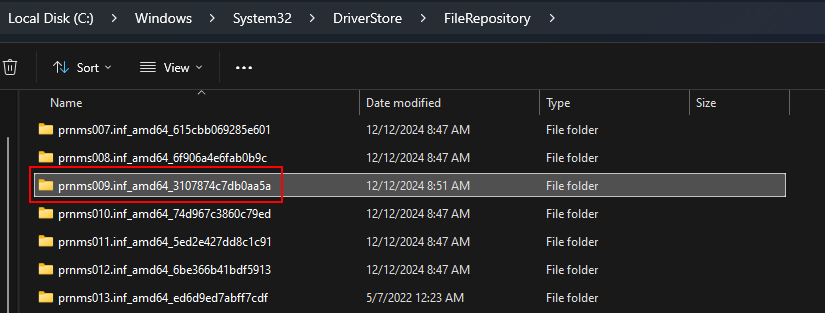
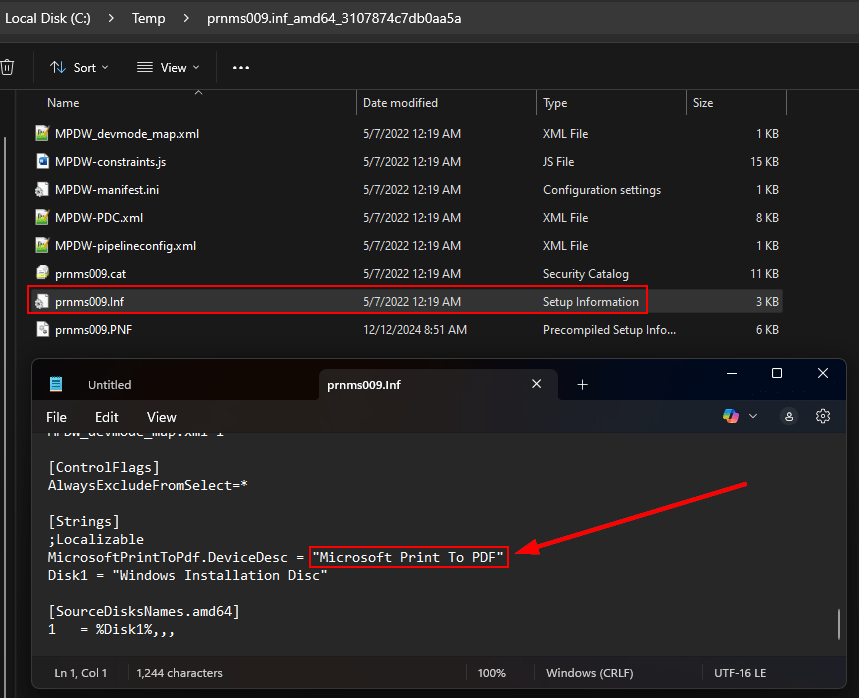
On a system where the PDF printer works, find the folder starting with prnms009 in c:\windows\system32\driverstore\filerepository and copy it to another location. Opening the prnms009.inf file will reveal that the driver is named “Microsoft Print to PDF.”
If you transfer the directory containing the driver files to the affected workstation, you can install the driver using the command:
pnputil /add-driver "\prnms009.inf" /install After the driver is installed, you can attempt to set up the Microsoft Print to PDF printer once more. It should succeed now that the driver is present.
If that still doesn’t work, you can manually install the printer via PowerShell by specifying the driver you just installed:
Add-Printer -Name "Microsoft Print to PDF" -DriverName "Microsoft Print To PDF" -PortName "PORTPROMPT:"Deploying with Intune
I had not encountered this issue until recently, and it seems uncommon for it to happen across multiple PCs. However, in my case, a faulty Windows 11 OEM image caused the Print-to-PDF printer to malfunction on a batch of new laptops. Thus, we needed a strategy to rectify this automatically when the PCs were provisioned with Autopilot before reaching users.
You can manage this as a remediation or a Win32 app. Given that I was utilizing Business Premium licensing, I opted for a Win32 app. All necessary files, including a packaged intunewin, can be found on GitHub. First, we need a detection script that checks for the existence of both the Print to PDF Feature printer and its corresponding driver.
$driver = Get-PrinterDriver -name "Microsoft Print to PDF" -ErrorAction SilentlyContinue
$printer = Get-Printer -name "Microsoft Print to PDF" -ErrorAction SilentlyContinue

If ($driver -and $printer) {
    Write-Output "Printer is detected"
    Exit 0
}
else {
    Write-Output "Printer or driver missing."
    Exit 1
}
If the printer or driver isn’t detected, our “install” script will execute to correct the Print-to-PDF printer issue. The install script first checks if the Print to PDF driver is installed. If it isn’t, the driver folder (copied from a working machine) will be transferred to the c:\windows\system32\driverstore\filerepository directory for installation. Subsequently, it reinstalls or enables the Windows feature for Print to PDF. Finally, it checks if the printer exists after feature installation. If not, it will manually install the printer.
$driver = Get-PrinterDriver -name "Microsoft Print to PDF" -ErrorAction SilentlyContinue
If (!$driver) {
Try {
move-item -path ".\prnms009.inf_amd64_3107874c7db0aa5a" -Destination "c:\windows\system32\driverstore\filerepository"
pnputil /add-driver "c:\windows\system32\driverstore\filerepository\.\prnms009.inf_amd64_3107874c7db0aa5a\prnms009.inf" /install
}
Catch {
Write-Host $_
}
}
Try {
# Reinstall or Install the Feature
Disable-WindowsOptionalFeature -Online -FeatureName Printing-PrintToPDFServices-Features -ErrorAction SilentlyContinue
Enable-WindowsOptionalFeature -Online -FeatureName Printing-PrintToPDFServices-Features -All -ErrorAction SilentlyContinue
$printer = Get-Printer -name "Microsoft Print to PDF" -ErrorAction Continue
If (!$printer) {
# Manually connect printer if feature install failed
Add-Printer -Name "Microsoft Print to PDF" -DriverName "Microsoft Print To PDF" -PortName "PORTPROMPT:"
}
}
Catch {
Write-Host $_
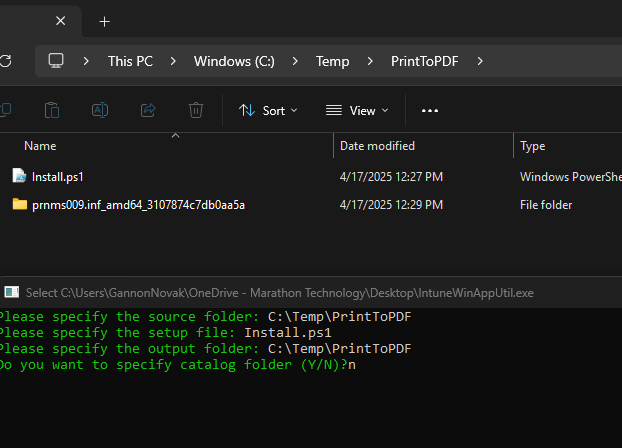
}Assuming you’re familiar with packaging and deploying a Win32 app, you can directly obtain the .intunewin file from GitHub here. Otherwise, you can package it yourself. Ensure the install file resides in the same directory as the folder containing your driver. The driver files are also available on GitHub for your convenience. To package these as an intunewin file:
Create a new Win32 app in Intune by utilizing the intunewin file you just created or downloaded. Use the following install command:
powershell.exe -executionpolicy bypass .\install.ps1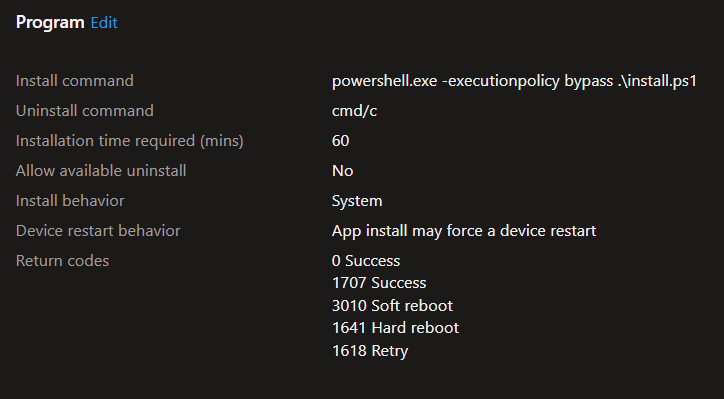
Select the custom detection script as the detection method:
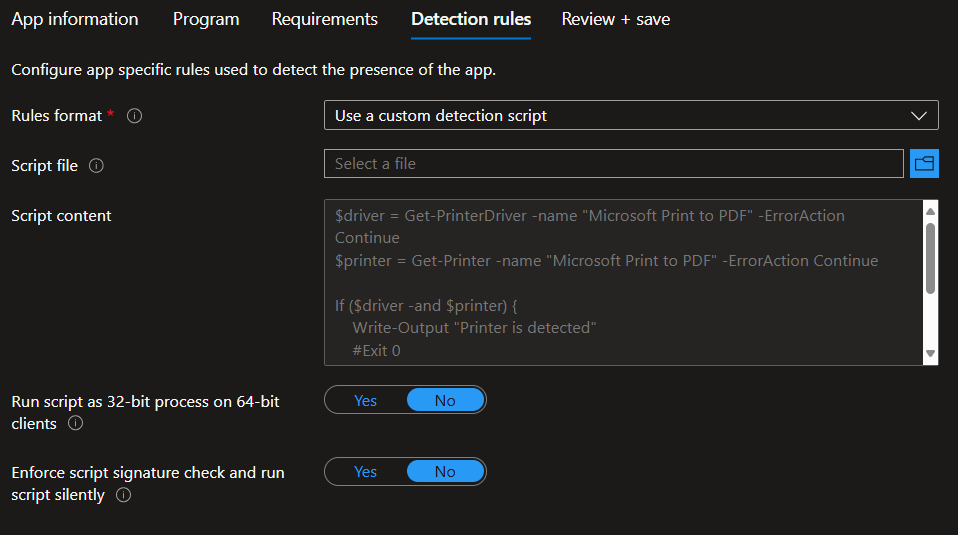
Finally, deploy the app to your devices, ensuring the Microsoft PDF Printer is installed the next time they check in.
Leave a Reply