
I perform extensive testing for clients and prospects using Azure, Intune, and Autopilot. While I primarily rely on Hyper-V VMs for most of my testing, there are instances when I need to test or troubleshoot pre-provisioning or self-deploying Autopilot profiles. For such situations,
I keep a few spare physical machines, as VMs aren’t compatible with those Autopilot deployment methods. Since I don’t frequently use these machines, I occasionally forget to deregister them from the client tenant, leading to surprises when I attempt to use them only to find they’re already registered. Finding the tenant for an Autopilot device utilizing a regular user-driven autopilot profile is straightforward.
However, the process differs for devices assigned a self-deploying Autopilot profile. Initially, you have no way of knowing which tenant it’s registered to, as the login screen provides no hints (unless there is a device naming convention in place), and logging in to access the registry isn’t an option. This scenario leaves us with a few alternatives.
- You could factory reset the device, and once the ESP activates, use shift+F10 to access an admin command prompt, allowing you to check the registry for the tenant connection. However, you must utilize the Windows startup options to reset and closely monitor the process, ensuring you reach the command line before it completes Autopilot and lands on the Windows login screen. Alternatively, you can disconnect the ethernet during the reset to prevent the device from pulling the Autopilot configuration upon rebooting. Yet, this method still requires a complete factory reset, which is not the most efficient use of time, as you may need to reset it a second time to determine the tenant and release it.
- Another option is to use a boot drive, like Hirens Boot CD, to load a lightweight version of Windows, access the registry hive, and find the tenant. If a boot drive is available, this can be an effective solution.
- Utilizing the Windows recovery startup menu is the most efficient method I will detail here.
To start, hold shift and restart the device. This will display the startup menu:
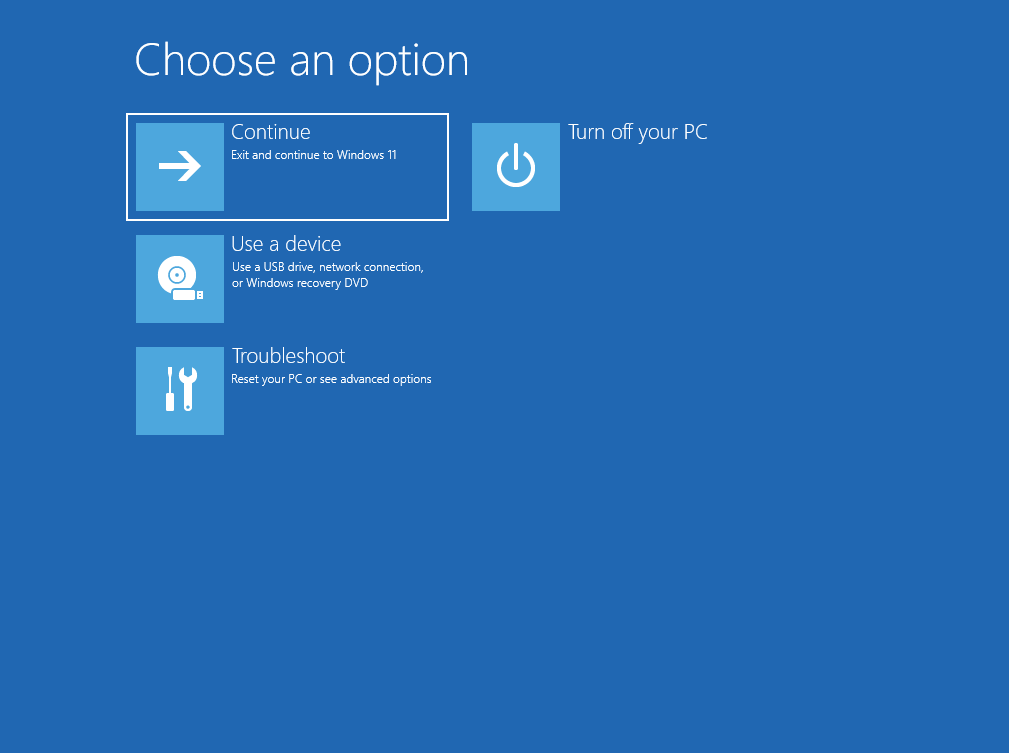
Select Troubleshoot, followed by Advanced Options:
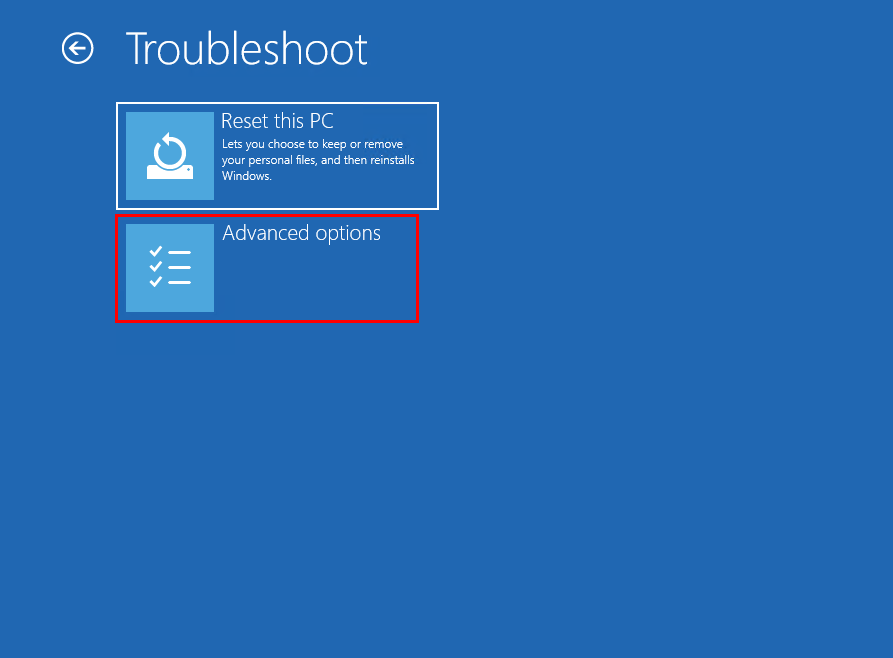
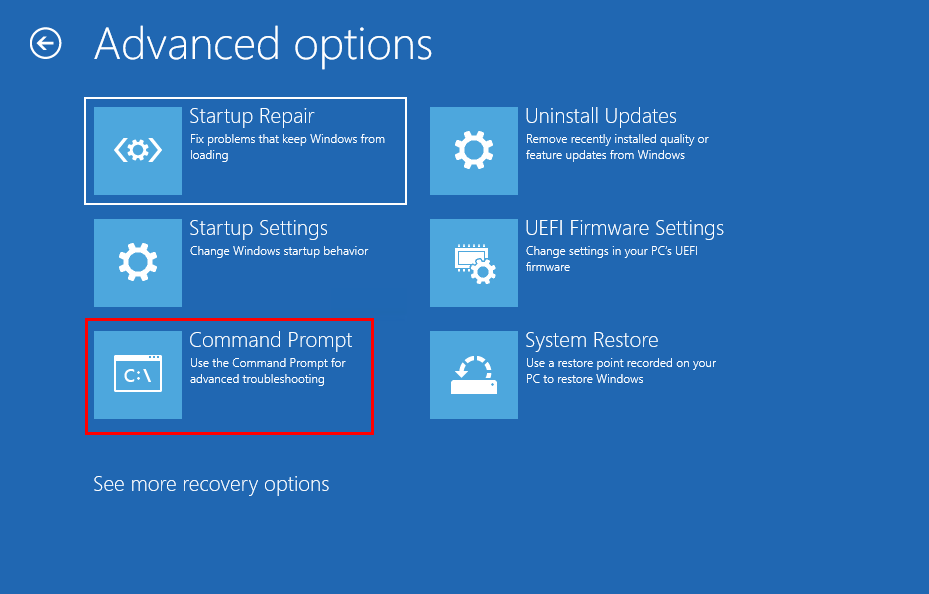
Next, choose Command Prompt:
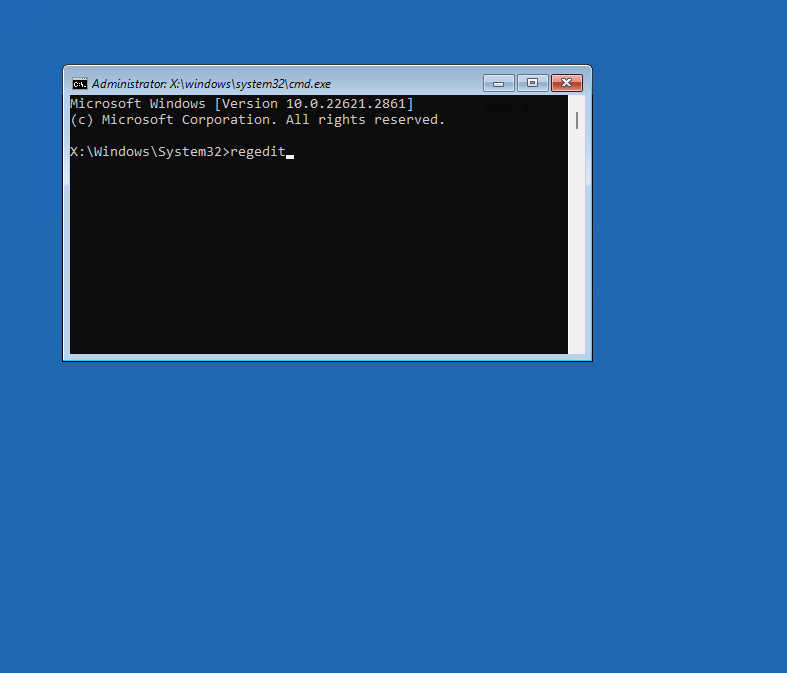
Notice that the command prompt does not default to C:; instead, it uses X:, which indicates the Windows recovery environment with a minimal version of Windows loaded as a RAM disk. You should type regedit into the command prompt to access the registry.
You’ll observe that there’s minimal content in the registry, as it points to the hives for the recovery environment. We need to load the hive from our C: Windows installation. Select HKEY_LOCAL_MACHINE:

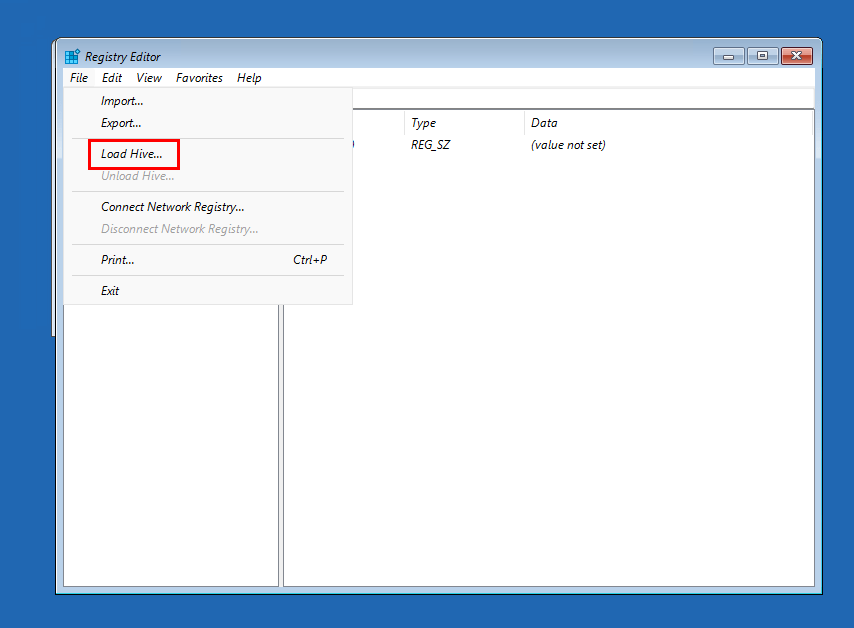
Then, click File > Load Hive:
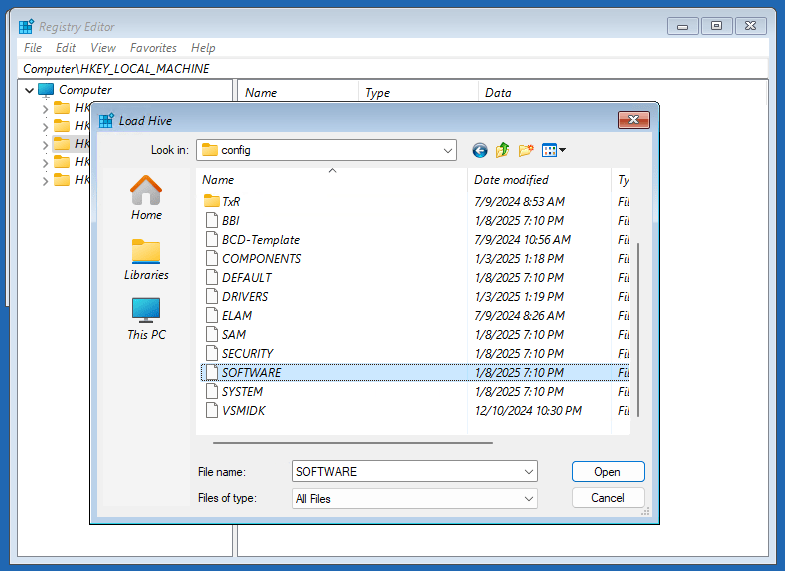
Navigate to C:\Windows\System32\Config\Software (this corresponds to the hive for HKLM). By default, the explorer starts in the X: drive, so make sure to switch to C:
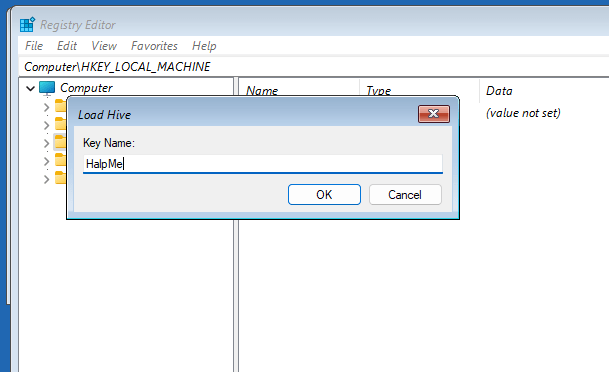
You’ll be prompted to provide a Key Name; click OK. This name will be used to access the HKLM hive, which will be nested under the top-level HLKM.
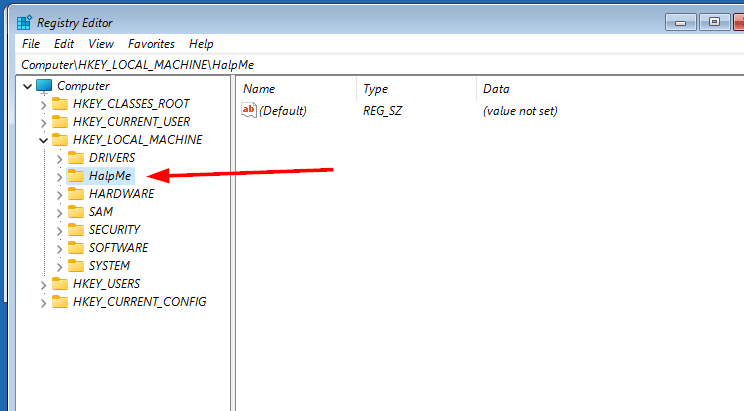
We can now see it under HLKM:
Navigate to Microsoft > Provisioning > Diagnostics > Autopilot:
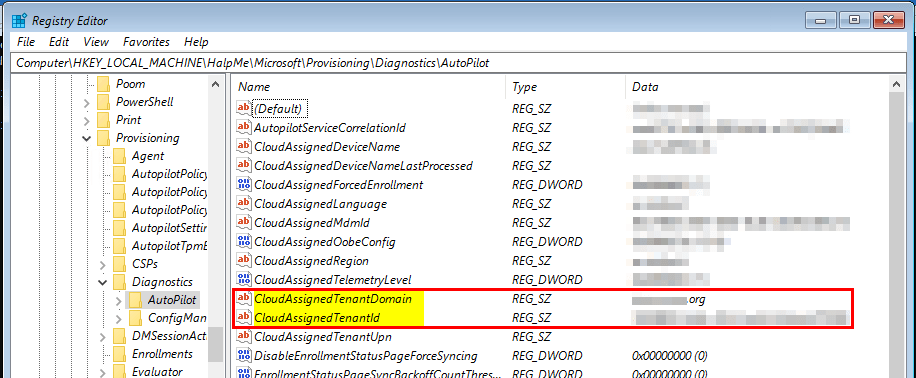
Here, you will find the Tenant Domain and the TenantID. With this information, you can return to the respective client or tenant and remove your device from Autopilot, allowing it to be utilized for testing in other organizations.
Leave a Reply